> ## Documentation Index
> Fetch the complete documentation index at: https://thehyperstack.com/docs/llms.txt
> Use this file to discover all available pages before exploring further.
# Team Mangement
> Any issuing organization can have more than one login to manage different activities. The Credential Cloud offers users to make use of the team management feature to assign different roles, with different access permissions.
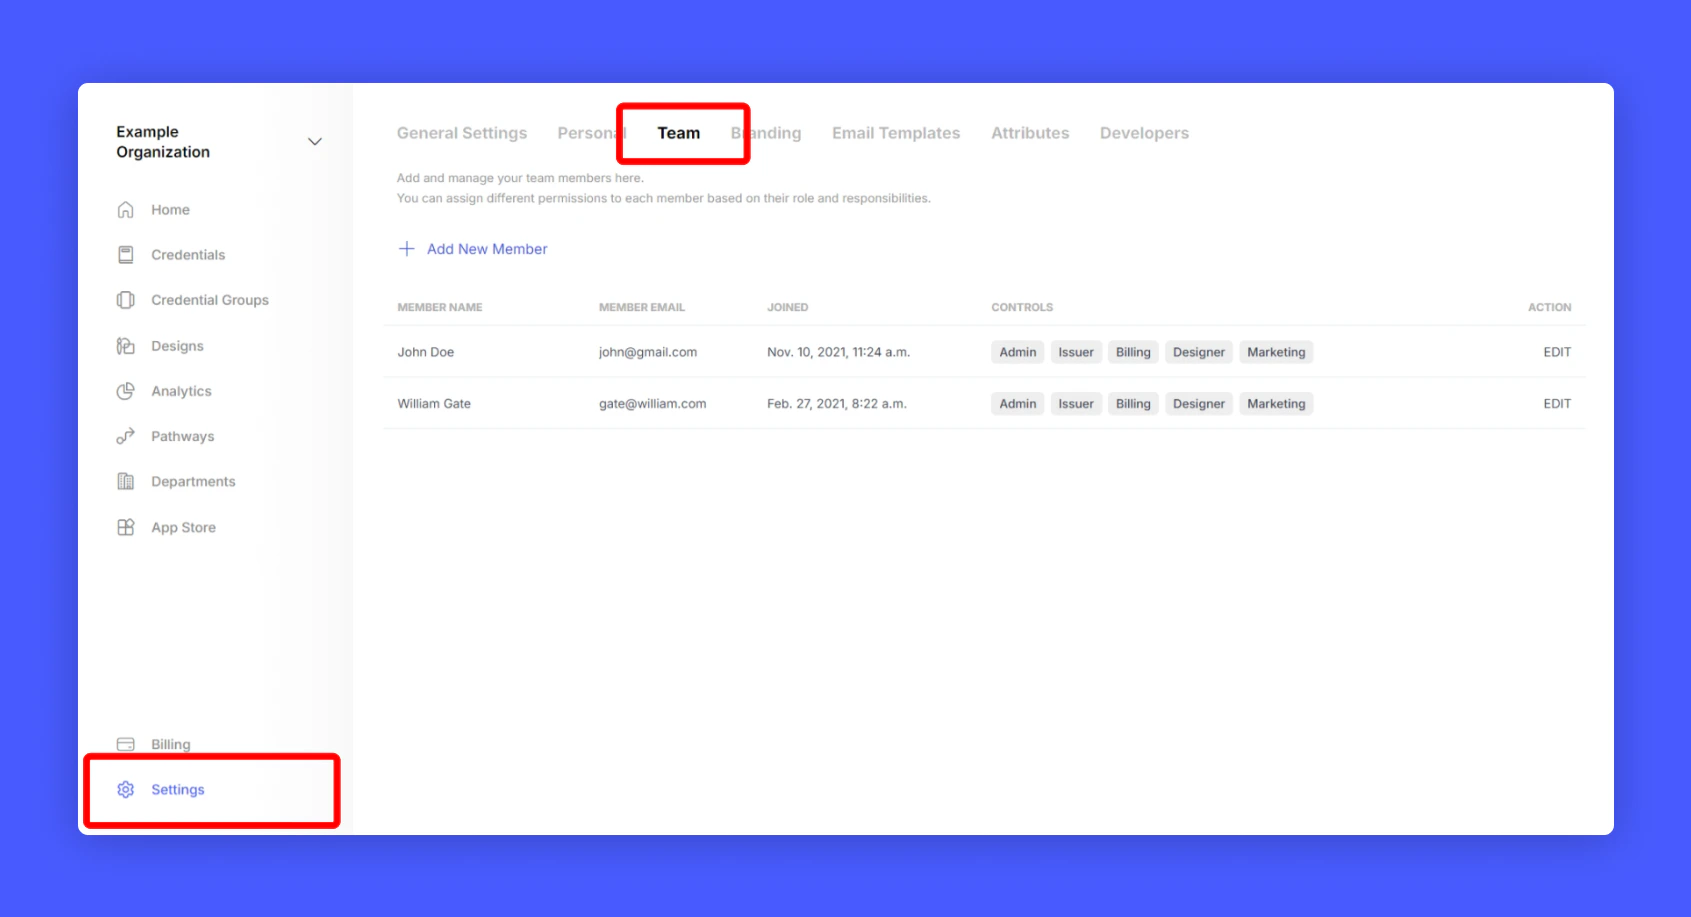
Go to Settings and click Teams from your issuer account home page
 ### Roles and Permissions
1. Administrator: The admin has full access to the account and can manage all the settings.
2. Credential Issuer: The credential issuer will only have access to issue credentials and manage the credentials.
3. Designer: The credential designer will only have access to designing certificates and badges.
4. Marketing Manager: The marketing manager will only have access to analytics and insights data.
5. Billing Manager: The billing manager will only have access to billing and payment settings.
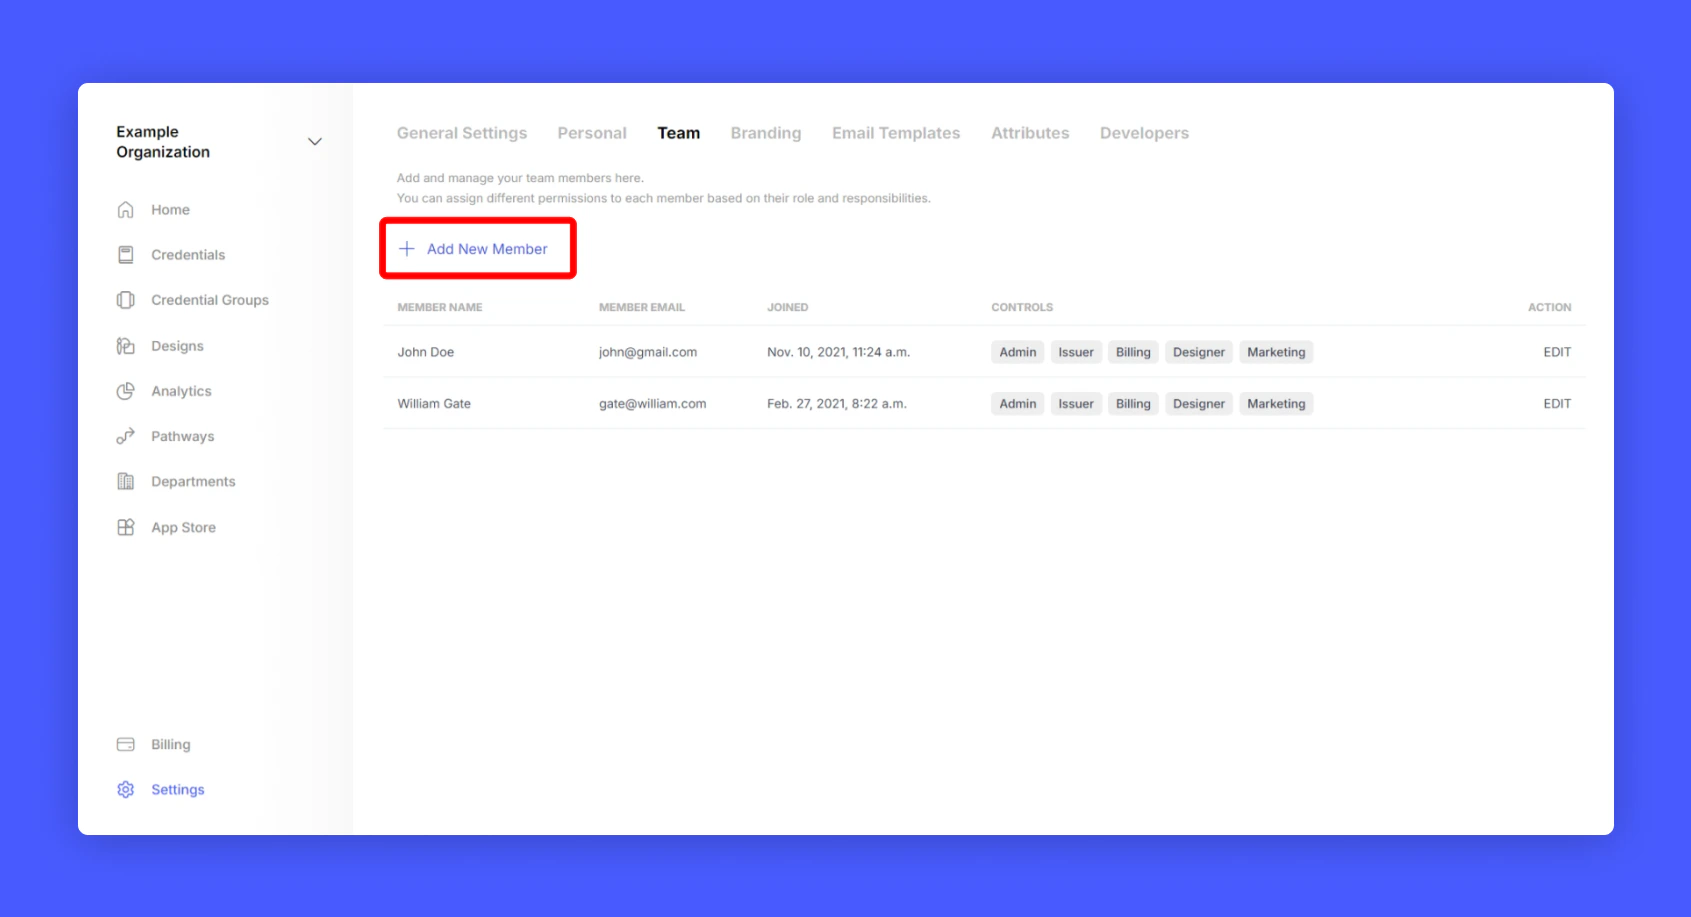
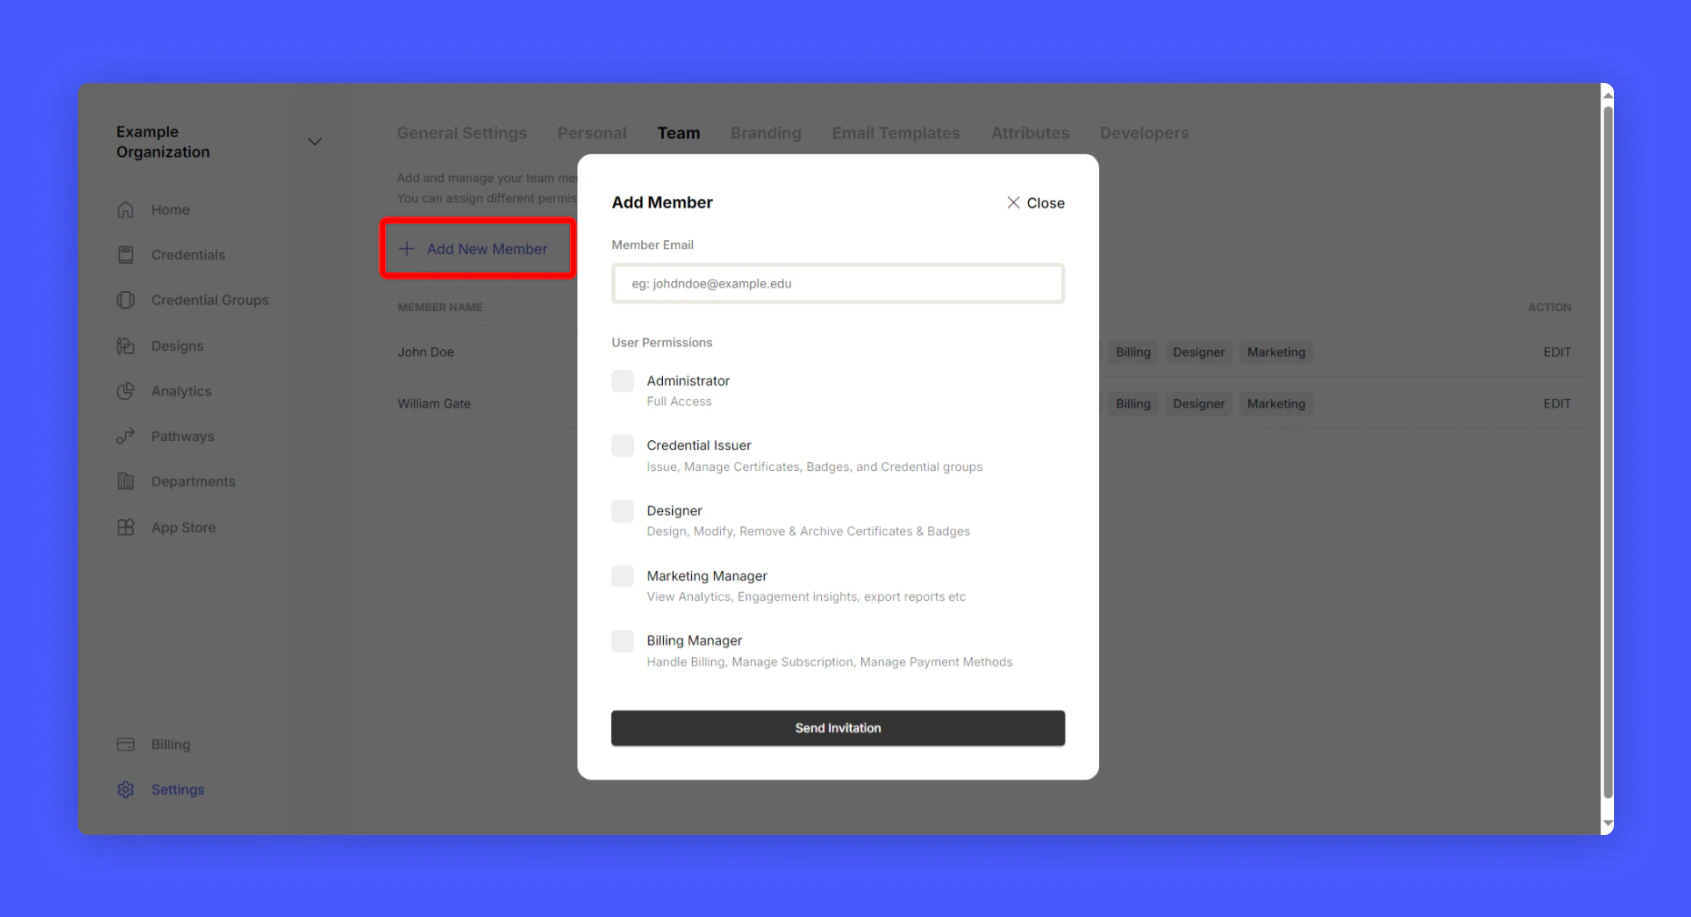
### Adding a new member to the team
An email will be sent to the new member to join the team. Once the new member accepts the invitation, they will be able to login to the Credential Cloud with the assigned role and permissions.
### Roles and Permissions
1. Administrator: The admin has full access to the account and can manage all the settings.
2. Credential Issuer: The credential issuer will only have access to issue credentials and manage the credentials.
3. Designer: The credential designer will only have access to designing certificates and badges.
4. Marketing Manager: The marketing manager will only have access to analytics and insights data.
5. Billing Manager: The billing manager will only have access to billing and payment settings.
### Adding a new member to the team
An email will be sent to the new member to join the team. Once the new member accepts the invitation, they will be able to login to the Credential Cloud with the assigned role and permissions.
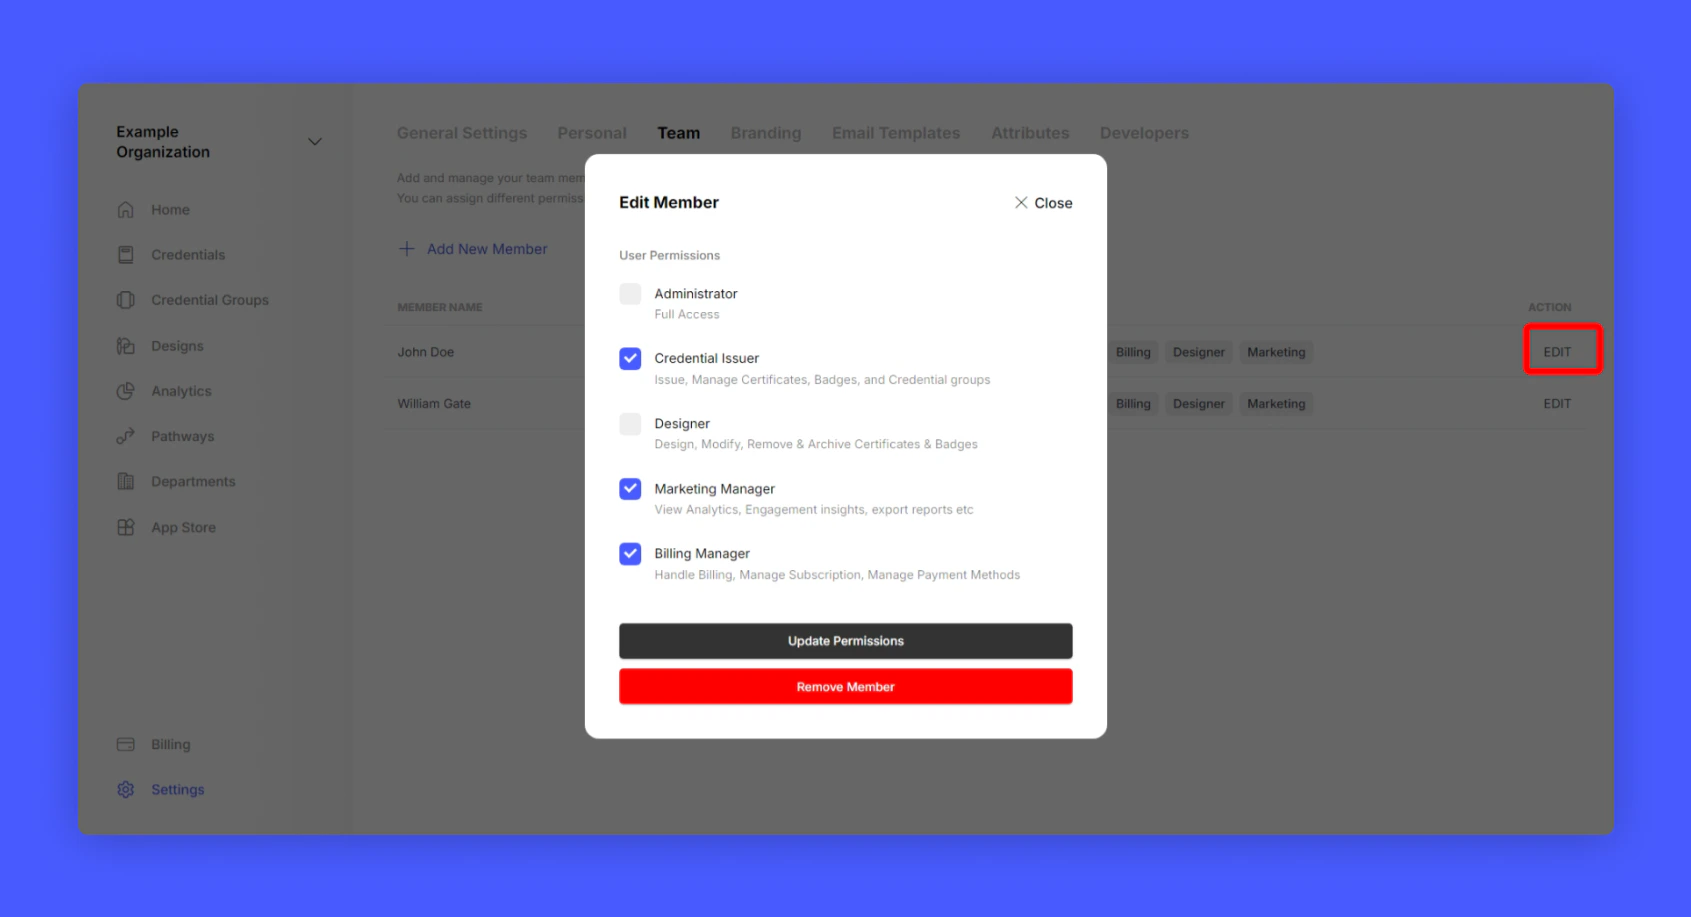
 ### Changing permissions or removing a team member
If you wish to change the permissions of a team member or remove them from the team, follow the steps below:
### Changing permissions or removing a team member
If you wish to change the permissions of a team member or remove them from the team, follow the steps below: