> ## Documentation Index
> Fetch the complete documentation index at: https://thehyperstack.com/docs/llms.txt
> Use this file to discover all available pages before exploring further.

# Issuing your first Credential

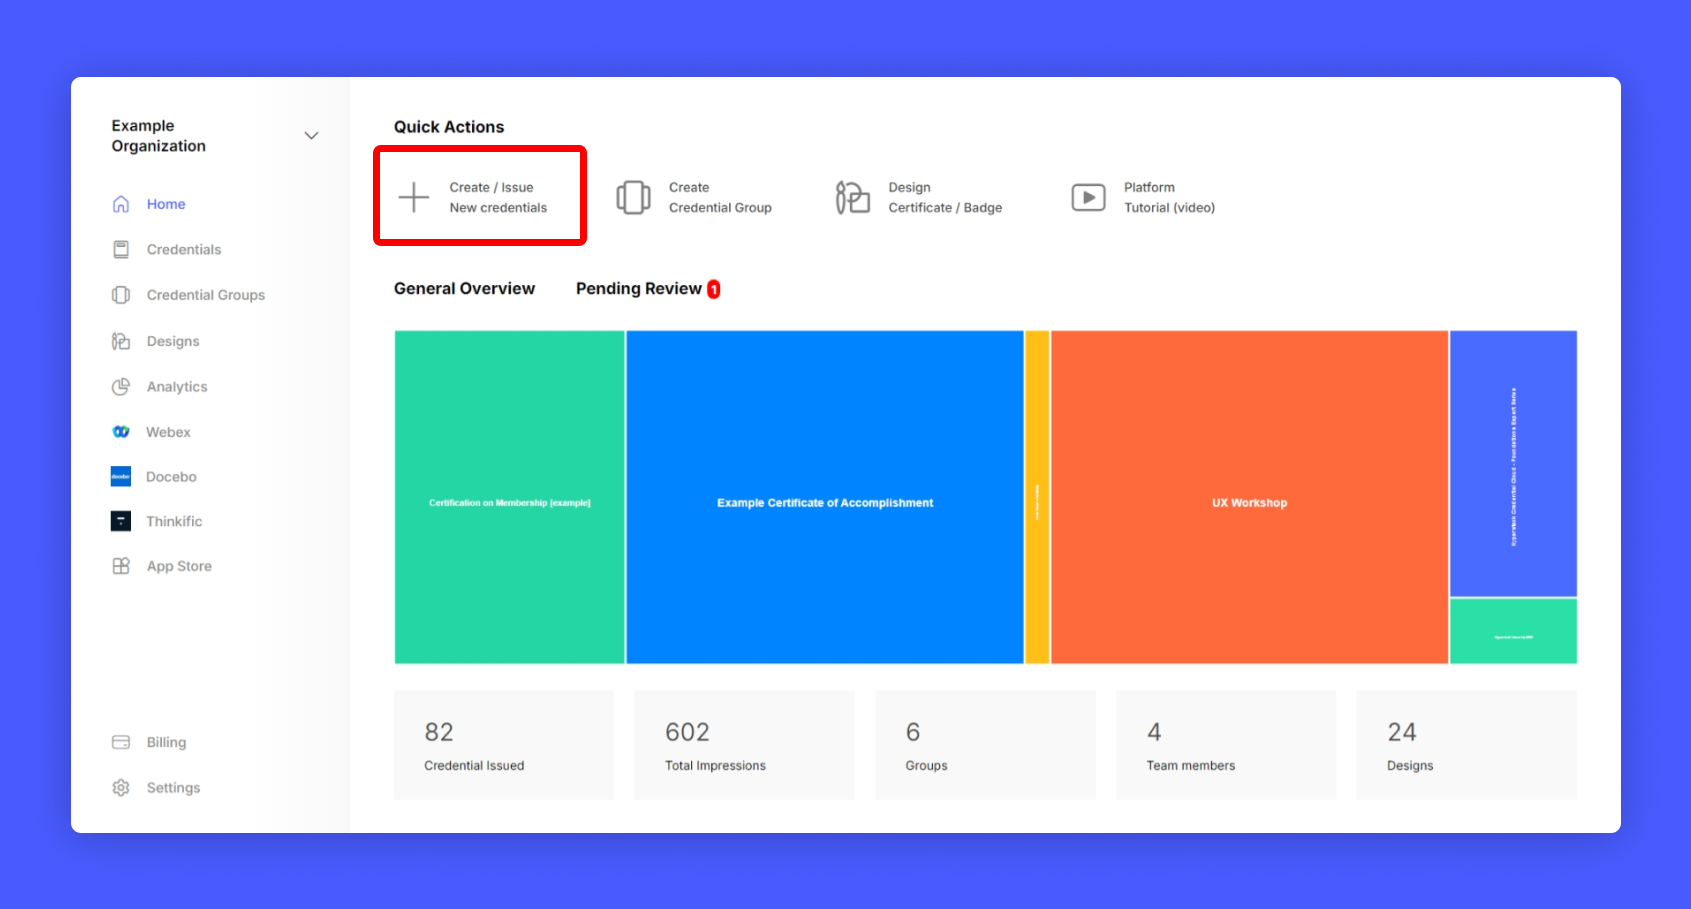
> Issuing the certificates and badges on the Credential Cloud is simple, Once you import/design your dynamic certificate/ badge design and create a credential group for the course/program you can start issuing the credentials for the same.

Before issuing certificates, make sure you have completed designing the certificate and credential group

<Columns cols={2}>
  <Card title="Designing Certificate" icon="pen-fancy" href="/tutorials/credential-setup/designing-certificate">
    Credential Cloud has its own design studio for creating dynamic
    certificates, plus a native Canva integration to use their templates and
    design tools easily.
  </Card>

  <Card title="Creating Credential Group" icon="people-group" href="/tutorials/credential-setup/creating-credential-group">
    Creating a credential group is key to issuing credentials. It holds the
    course/program details shown on certificates and lets you set templates and
    manage settings—all from one place.
  </Card>
</Columns>

<Steps>
  <Step title="Click Create/issue New Credential from your issuer account home page">
    <Frame>
      <img src="https://mintcdn.com/hyperstack/hEnRmZQQlgTIvjyK/images/issuing-credential-1.png?fit=max&auto=format&n=hEnRmZQQlgTIvjyK&q=85&s=040105ea5b64f4e3a75843a045c61f0c" alt="Screenshot of a deployment confirmation message that says All checks have passed." style={{ borderRadius: "0.5rem" }} width="1691" height="909" data-path="images/issuing-credential-1.png" />
    </Frame>
  </Step>

  <Step title="Choose the Credential Group from which you want to issue the certificate/badge">
    You can scroll horizontally to see more credential groups. or search by name from the top right search bar.

    <Frame>
      <img src="https://mintcdn.com/hyperstack/hEnRmZQQlgTIvjyK/images/issuing-credential-2.gif?s=a548de1a25516250860ef7162a5376be" alt="Screenshot of a deployment confirmation message that says All checks have passed." style={{ borderRadius: "0.5rem" }} width="1910" height="933" data-path="images/issuing-credential-2.gif" />
    </Frame>
  </Step>

  <Step title="Enter the recipient details">
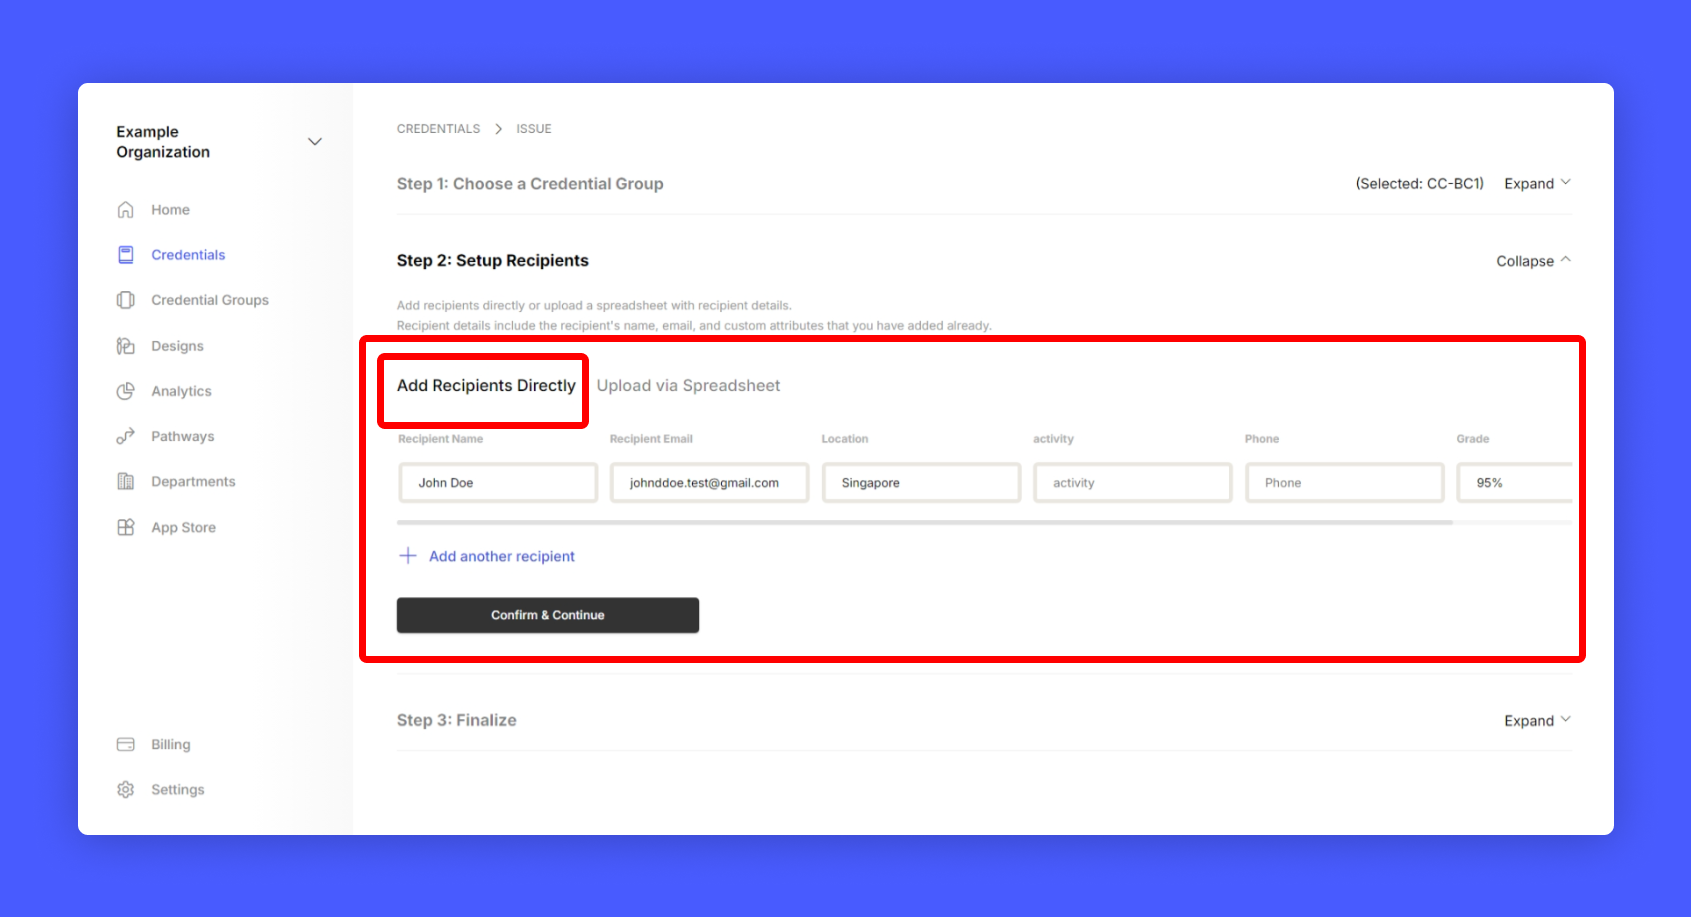
    Option 1: Manually enter the recipient details in the form

    <Frame>
      <img src="https://mintcdn.com/hyperstack/hEnRmZQQlgTIvjyK/images/issuing-credential-3.png?fit=max&auto=format&n=hEnRmZQQlgTIvjyK&q=85&s=30da4386e877ff40652942e851a41c64" alt="Screenshot of a deployment confirmation message that says All checks have passed." style={{ borderRadius: "0.5rem" }} width="1691" height="917" data-path="images/issuing-credential-3.png" />
    </Frame>

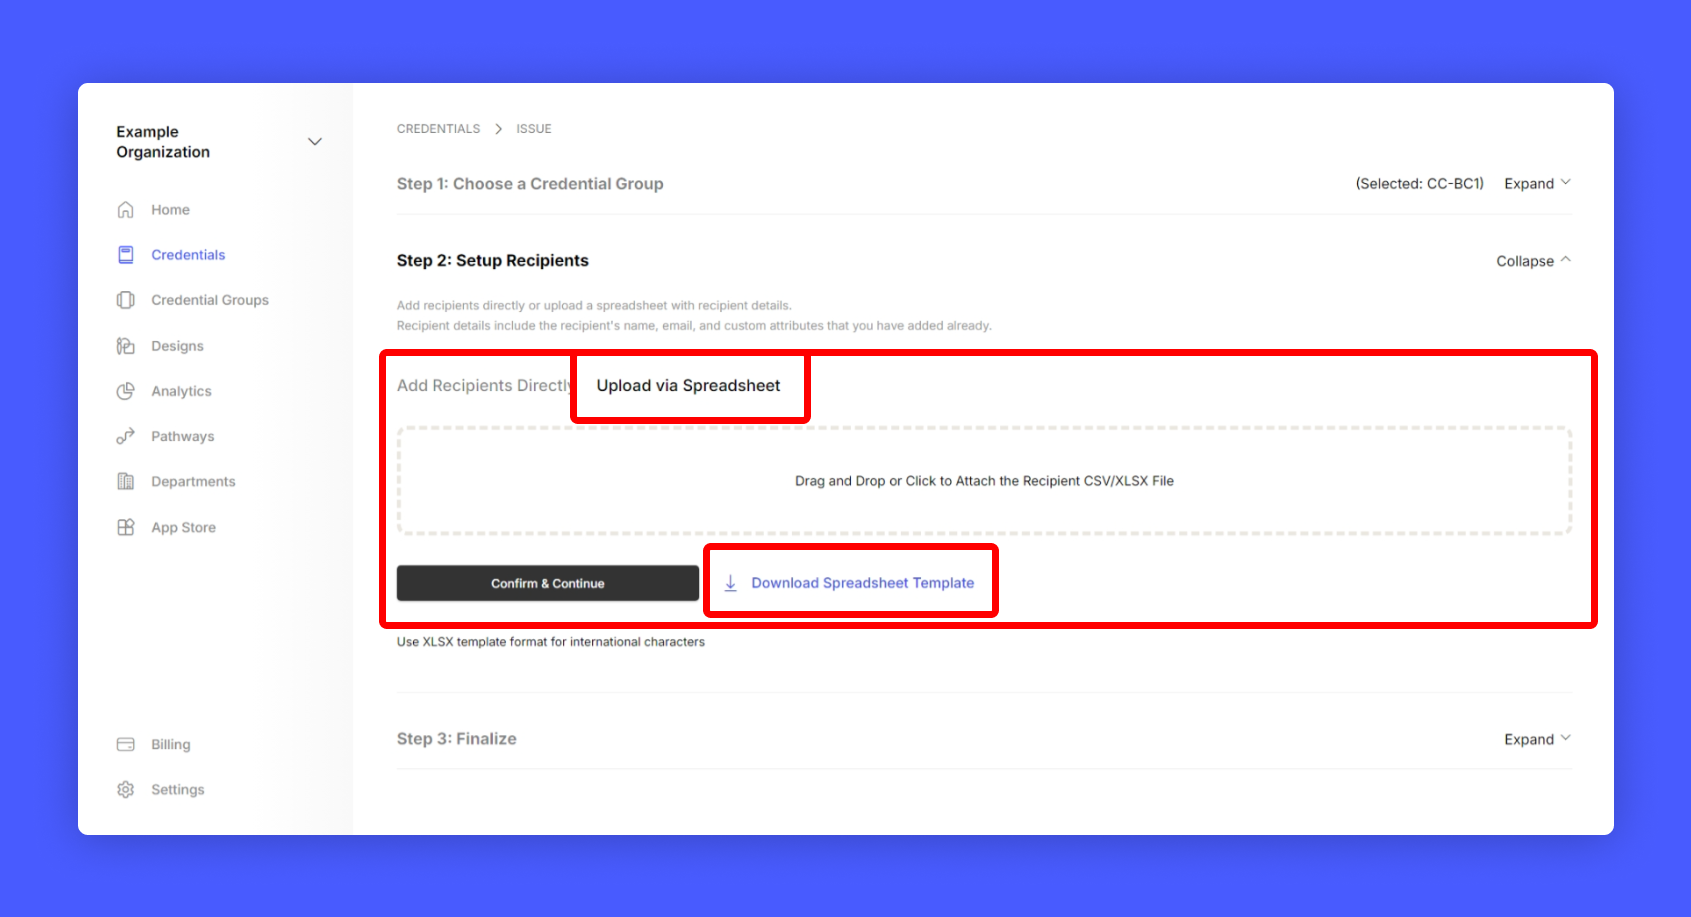
    Option 2: Bulk Upload recipient details using a spreadsheet. To download the template click on the download Spreadsheet template button.

    Note: If your recipient details have International characters use XLSX format only to prevent data loss.

    <Frame>
      <img src="https://mintcdn.com/hyperstack/hEnRmZQQlgTIvjyK/images/issuing-credential-3.1.png?fit=max&auto=format&n=hEnRmZQQlgTIvjyK&q=85&s=9f4be8ca77b84a889a35ef35cd20eb45" alt="Screenshot of a deployment confirmation message that says All checks have passed." style={{ borderRadius: "0.5rem" }} width="1691" height="917" data-path="images/issuing-credential-3.1.png" />
    </Frame>
  </Step>

  <Step title="Fill in the recipient details as given in the sheet and save (Note: Do not alter predefined rows)">
    <Frame>
      <img src="https://mintcdn.com/hyperstack/hEnRmZQQlgTIvjyK/images/issuing-credential-4.gif?s=2114f9795aaa06096fb7af1f7f1947b5" alt="Screenshot of a deployment confirmation message that says All checks have passed." style={{ borderRadius: "0.5rem" }} width="999" height="525" data-path="images/issuing-credential-4.gif" />
    </Frame>
  </Step>

  <Step title="Attach the Spreadsheet and click Confirm and Continue">
    <Frame>
      <img src="https://mintcdn.com/hyperstack/hEnRmZQQlgTIvjyK/images/issuing-credential-5.png?fit=max&auto=format&n=hEnRmZQQlgTIvjyK&q=85&s=4bc06e63bbe89bc7be5dc6f78c5eede8" alt="Screenshot of a deployment confirmation message that says All checks have passed." style={{ borderRadius: "0.5rem" }} width="1691" height="917" data-path="images/issuing-credential-5.png" />
    </Frame>
  </Step>

  <Step title="Verify the details and click Generate Credentials">
    You can also set custom issue date and expiry date for the credentials at this step.

    <Frame>
      <img src="https://mintcdn.com/hyperstack/hEnRmZQQlgTIvjyK/images/issuing-credential-6.png?fit=max&auto=format&n=hEnRmZQQlgTIvjyK&q=85&s=5e390ceb7c2cca0feb4393d1dc9fdcea" alt="Screenshot of a deployment confirmation message that says All checks have passed." style={{ borderRadius: "0.5rem" }} width="1691" height="917" data-path="images/issuing-credential-6.png" />
    </Frame>

    Now you have successfully generated the credentials for the recipients.

    Note: The credentials are only generated and not published yet. To publish the credentials, follow the below steps.

    You will be taken to Under Review page, there you will find credentials that are ready for review.

    <Frame>
      <img src="https://mintcdn.com/hyperstack/hEnRmZQQlgTIvjyK/images/issuing-credential-7.png?fit=max&auto=format&n=hEnRmZQQlgTIvjyK&q=85&s=fce740d92f57b9edad1fc515324b6012" alt="Screenshot of a deployment confirmation message that says All checks have passed." style={{ borderRadius: "0.5rem" }} width="2030" height="870" data-path="images/issuing-credential-7.png" />
    </Frame>
  </Step>

  <Step title="Review the credential">
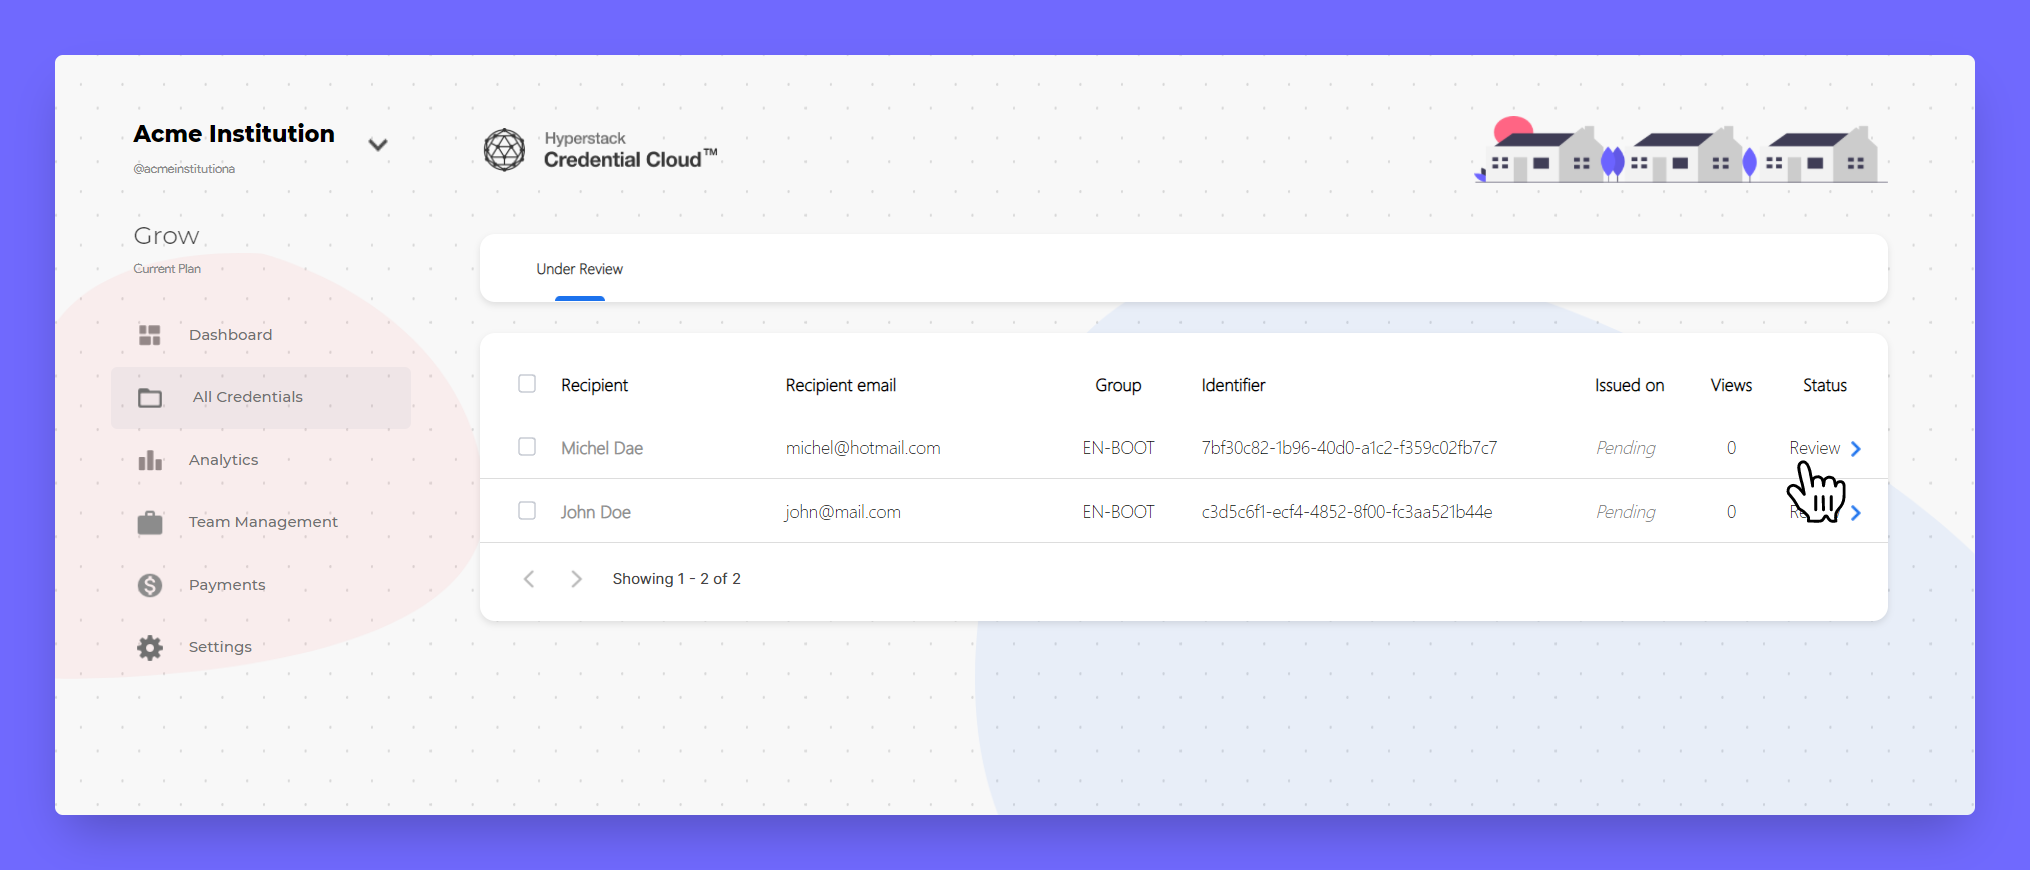
    On clicking one the credential, you will be taken to review page, where you'll see how credential will look like in recipient view.

    <Frame>
      <img src="https://mintcdn.com/hyperstack/hEnRmZQQlgTIvjyK/images/issuing-credential-8.gif?s=94efb7b7fafc3384b19d1919d299104b" alt="Screenshot of a deployment confirmation message that says All checks have passed." style={{ borderRadius: "0.5rem" }} width="1910" height="933" data-path="images/issuing-credential-8.gif" />
    </Frame>

    <Warning>
      **Found any mistake in Design or anywhere on credential?**

      Learn how to edit under review or unpublished credentials
    </Warning>
  </Step>

  <Step title="Go back to Issuer Home and select Pending review from the home page">
    Ready for publishing all credential?

    <Frame>
      <img src="https://mintcdn.com/hyperstack/hEnRmZQQlgTIvjyK/images/issuing-credential-9.png?fit=max&auto=format&n=hEnRmZQQlgTIvjyK&q=85&s=96494b64da625e3a957e76045c9f9038" alt="Screenshot of a deployment confirmation message that says All checks have passed." style={{ borderRadius: "0.5rem" }} width="1691" height="909" data-path="images/issuing-credential-9.png" />
    </Frame>
  </Step>

  <Step title="Select all the credentials you want to publish and click publish now">
    <Frame>
      <img src="https://mintcdn.com/hyperstack/hEnRmZQQlgTIvjyK/images/issuing-credential-10.png?fit=max&auto=format&n=hEnRmZQQlgTIvjyK&q=85&s=58098d9a5cca128290ef036cc6c55802" alt="Screenshot of a deployment confirmation message that says All checks have passed." style={{ borderRadius: "0.5rem" }} width="1691" height="917" data-path="images/issuing-credential-10.png" />
    </Frame>
  </Step>
</Steps>

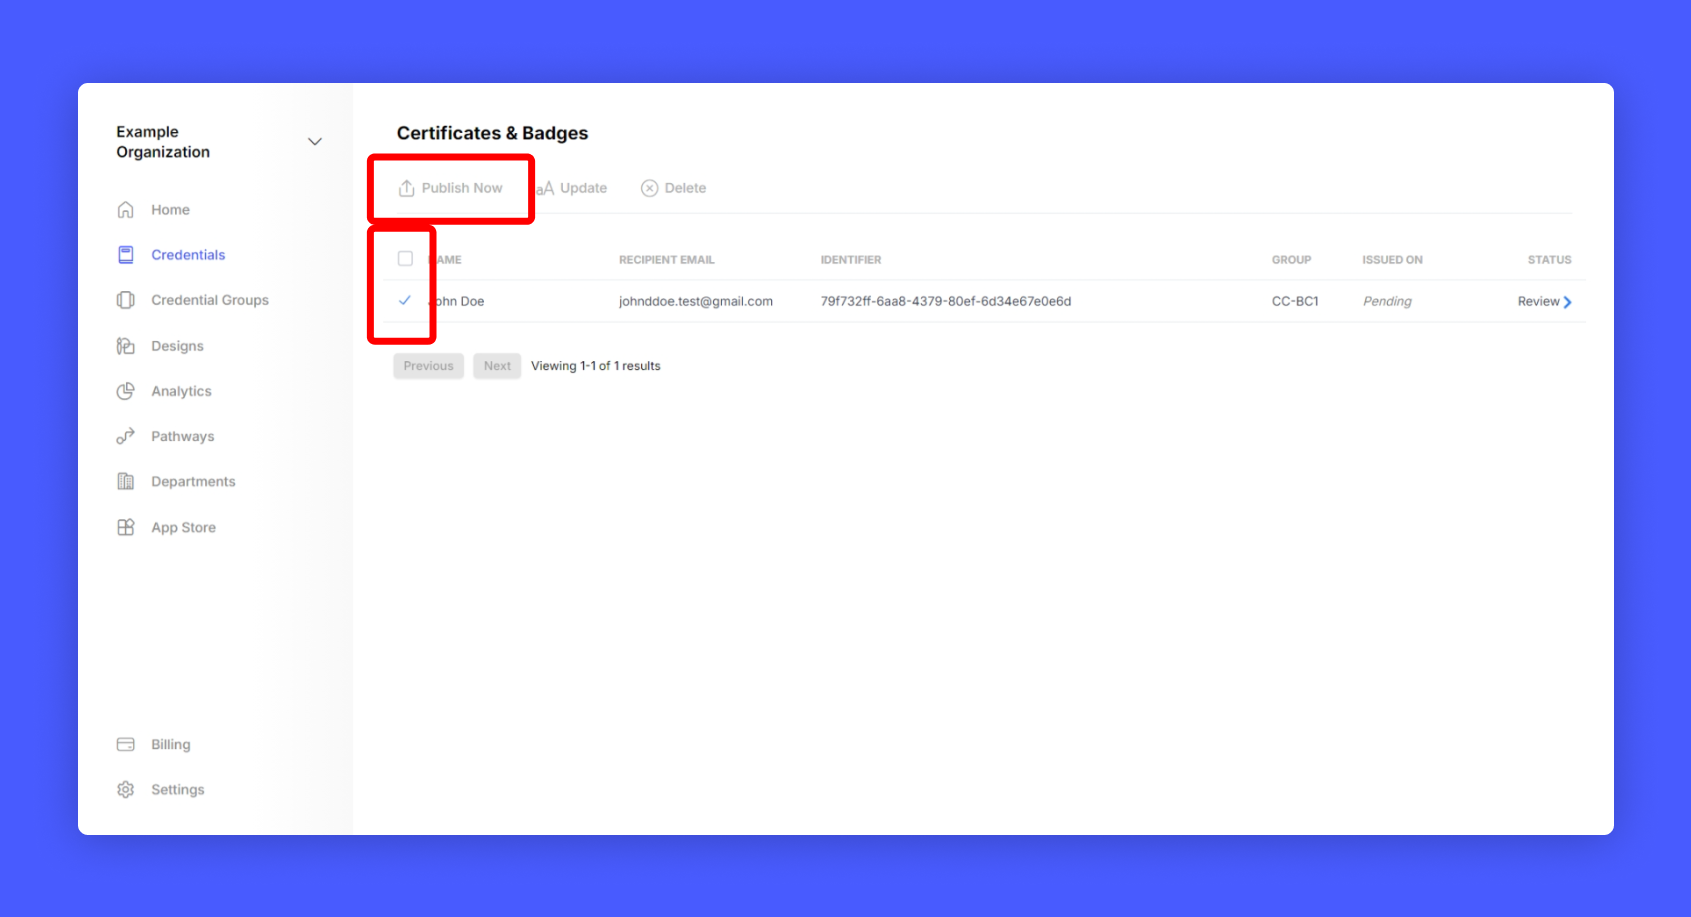
Hurray! you have successfully published your first credentials!
