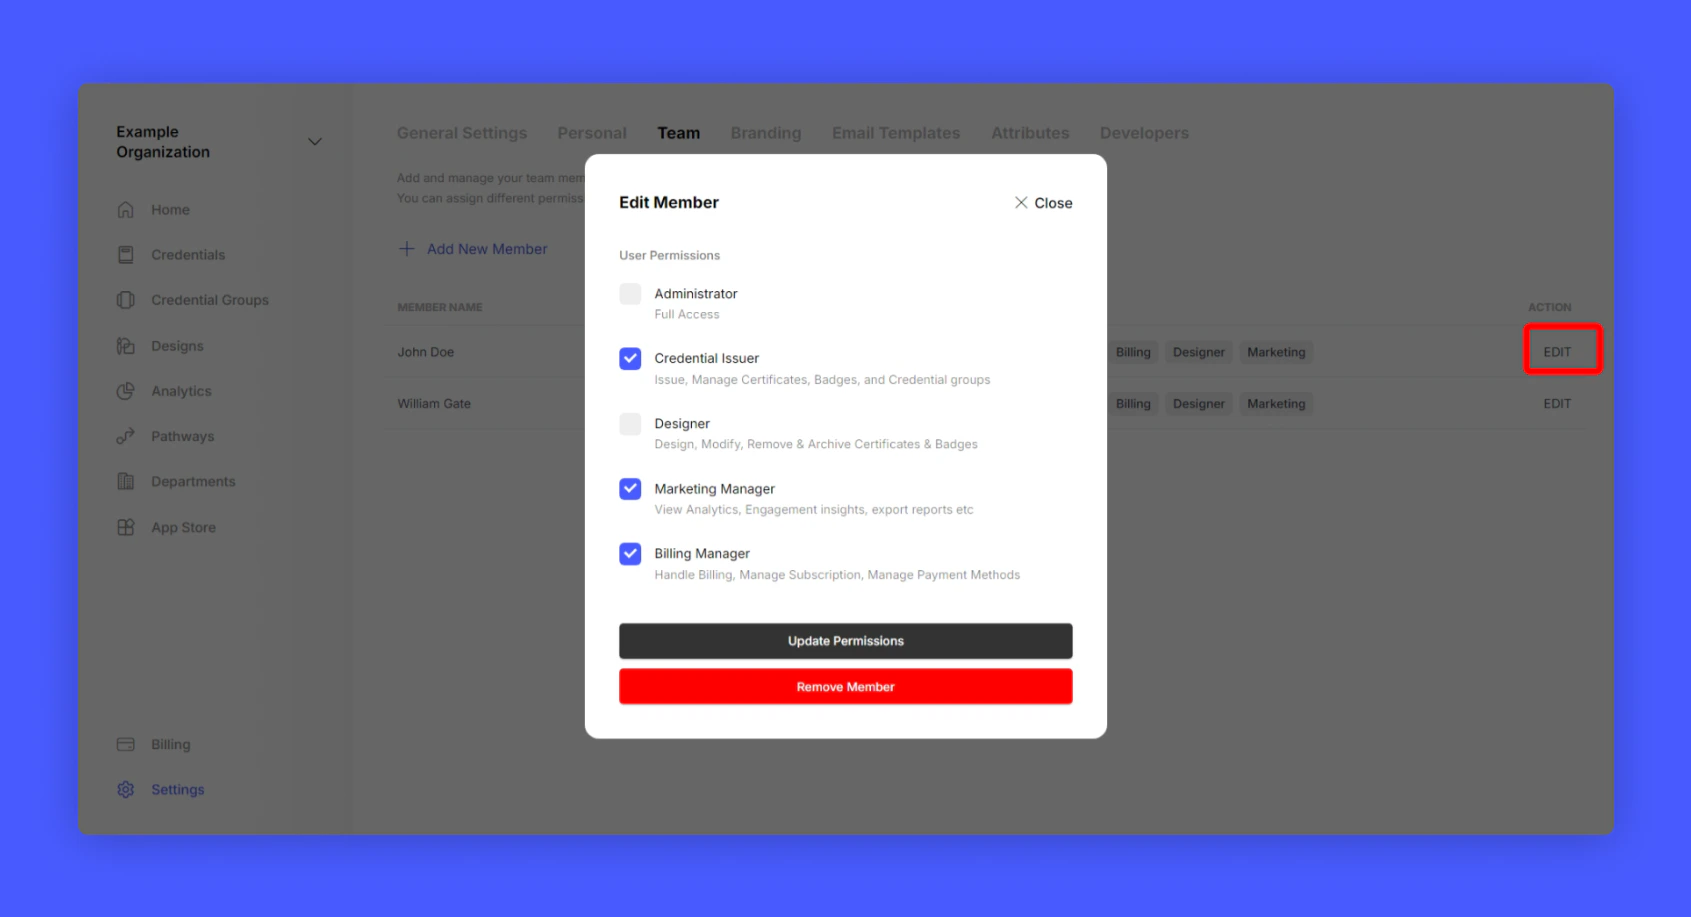
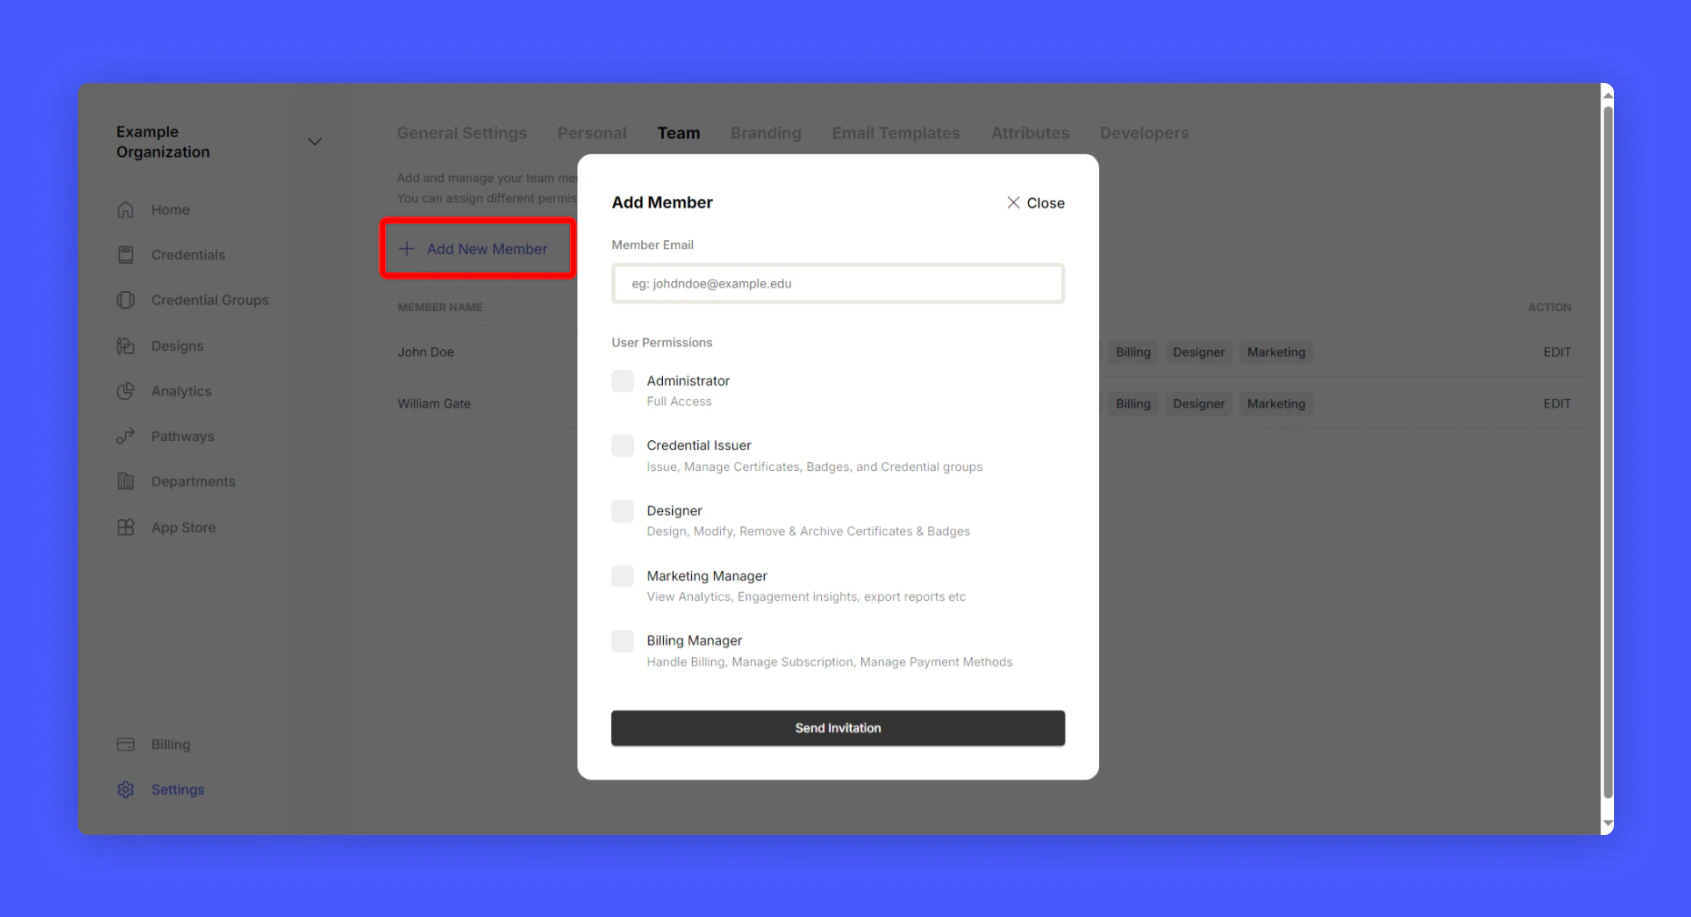
Roles and Permissions
- Administrator: The admin has full access to the account and can manage all the settings.
- Credential Issuer: The credential issuer will only have access to issue credentials and manage the credentials.
- Designer: The credential designer will only have access to designing certificates and badges.
- Marketing Manager: The marketing manager will only have access to analytics and insights data.
- Billing Manager: The billing manager will only have access to billing and payment settings.
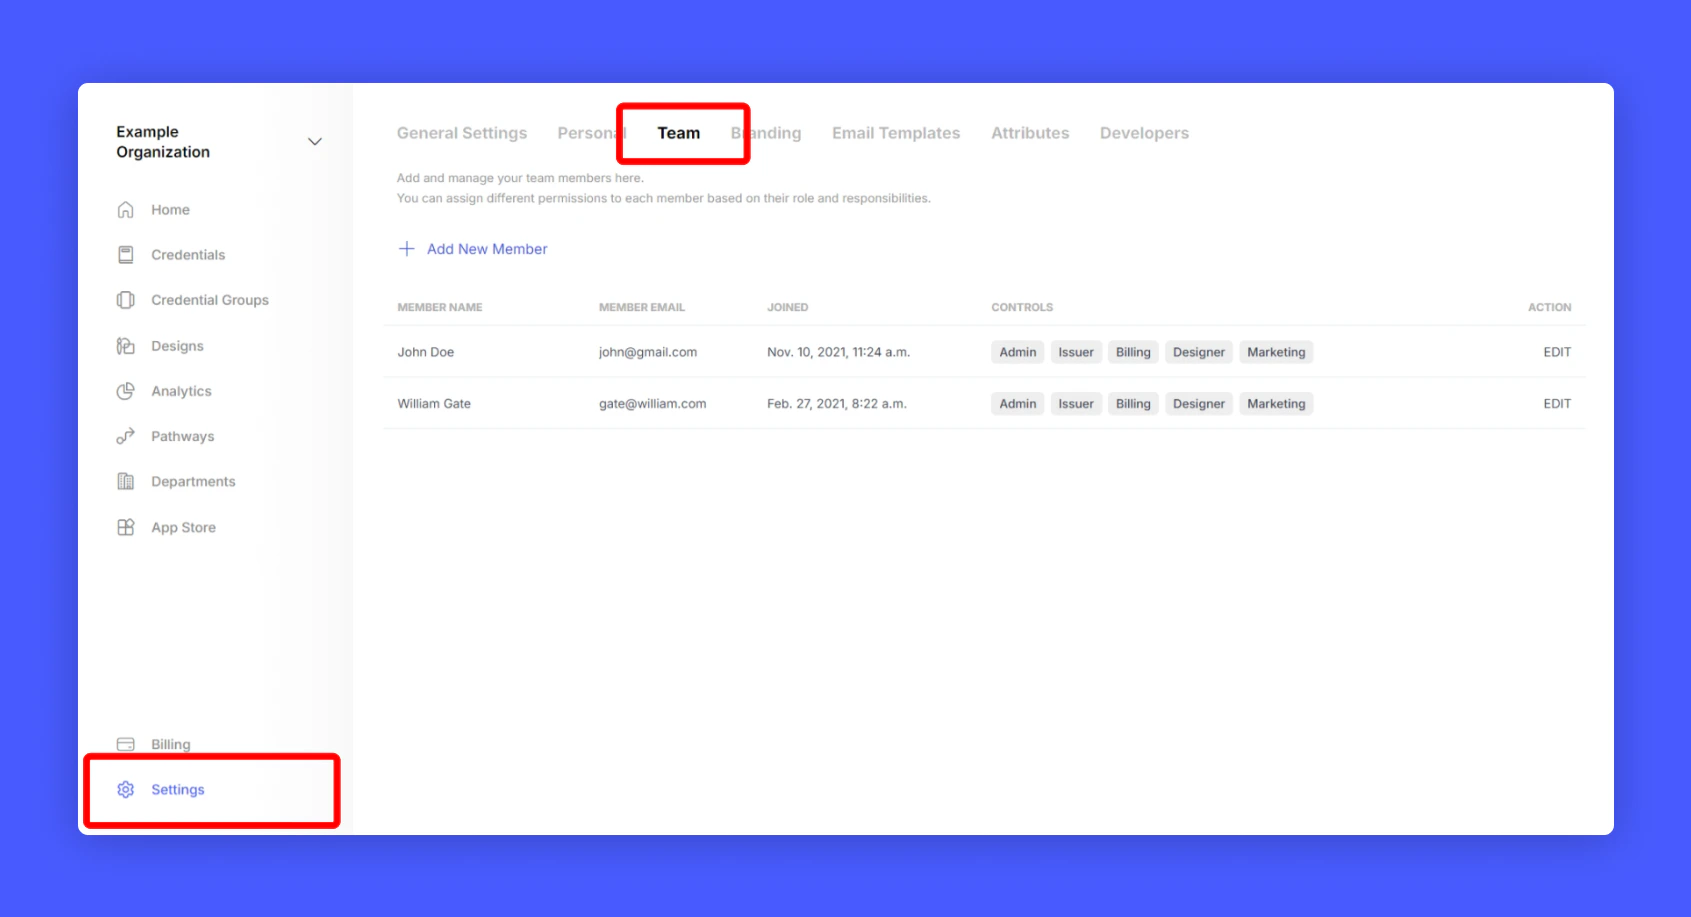
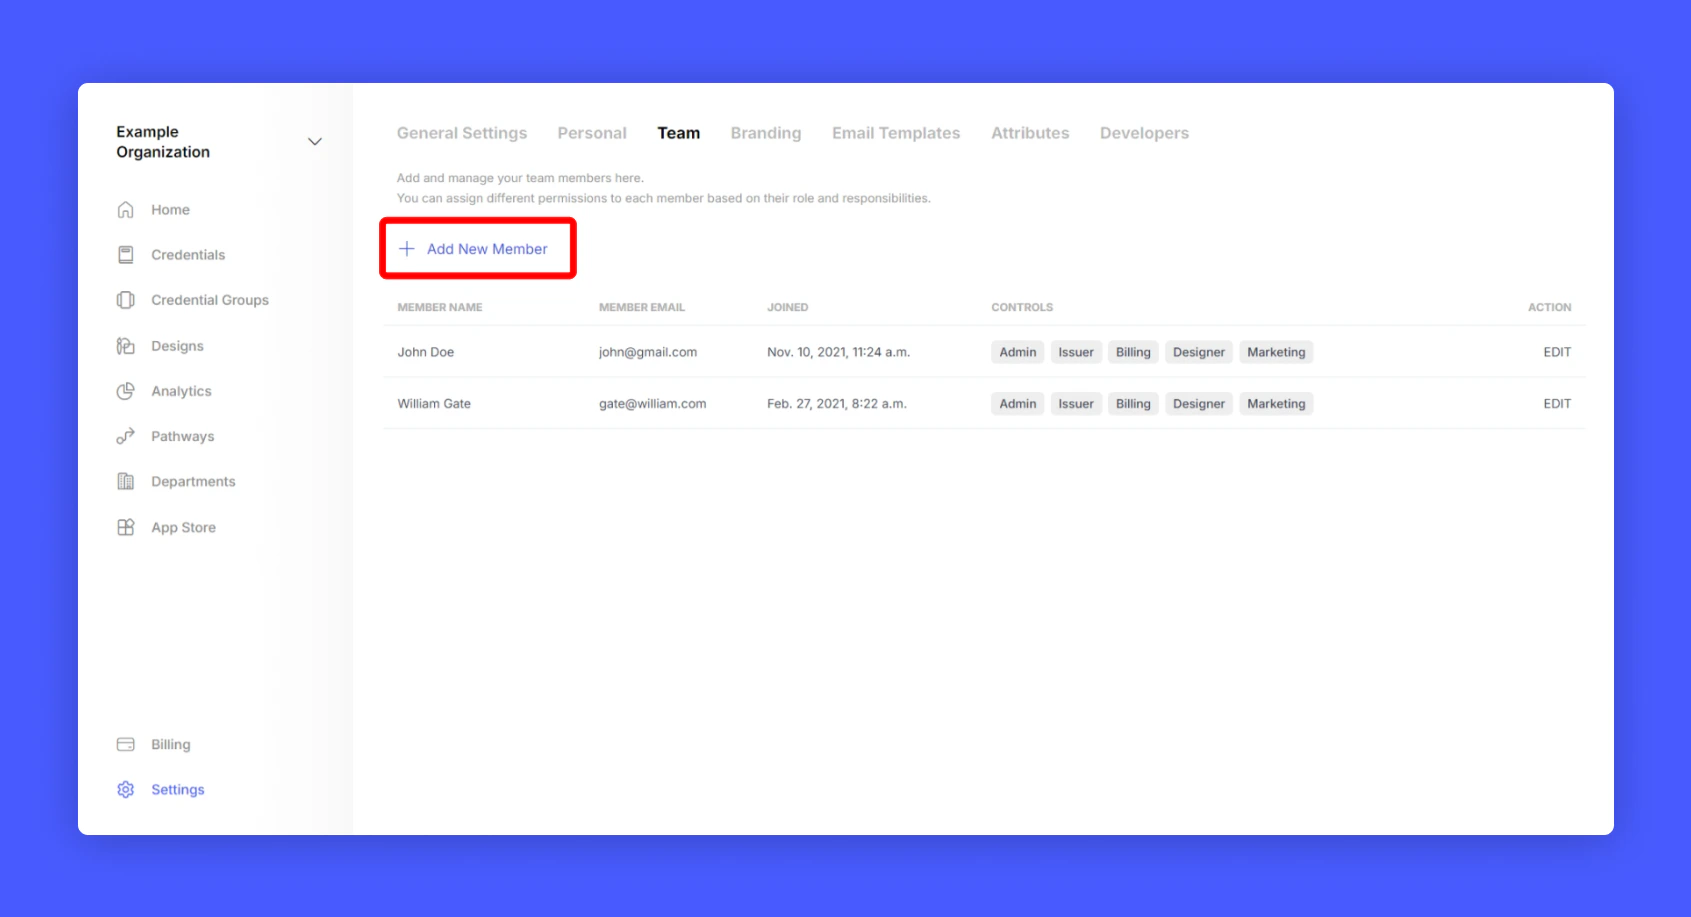
Adding a new member to the team
1
Click Add New Member to add a new member to the team
2
Enter the email address of the new member
3
Select the role for the new member
4
Click Add Member
An email will be sent to the new member to join the team. Once the new member accepts the invitation, they will be able to login to the Credential Cloud with the assigned role and permissions.
Changing permissions or removing a team member
If you wish to change the permissions of a team member or remove them from the team, follow the steps below:1
Click on the EDIT button at the end of the team member's name
2
Change the role or click on the REMOVE button to remove the team member