

hyperstack.id/ followed by your username. It shows your photo, name, bio and details, and a board with your credentials, links, projects and more. To change it, sign in at hyperstack.id and open the Page tab.
This guide shows two things you can do on your page:
- Pick a page style: Bento tiles or one Classic sheet.
- Add your experience: a timeline of your work and studies, with your credentials on each role.
Pick a page style
Your page has two styles. Visitors see the style you pick.- Bento (the default) shows your board as a grid of tiles.
- Classic shows the same tiles as one white sheet, in rows, in your order. Section titles become headings. Credentials are rows with a Verified or Uploaded label. Social links show in two columns, and images in one strip.
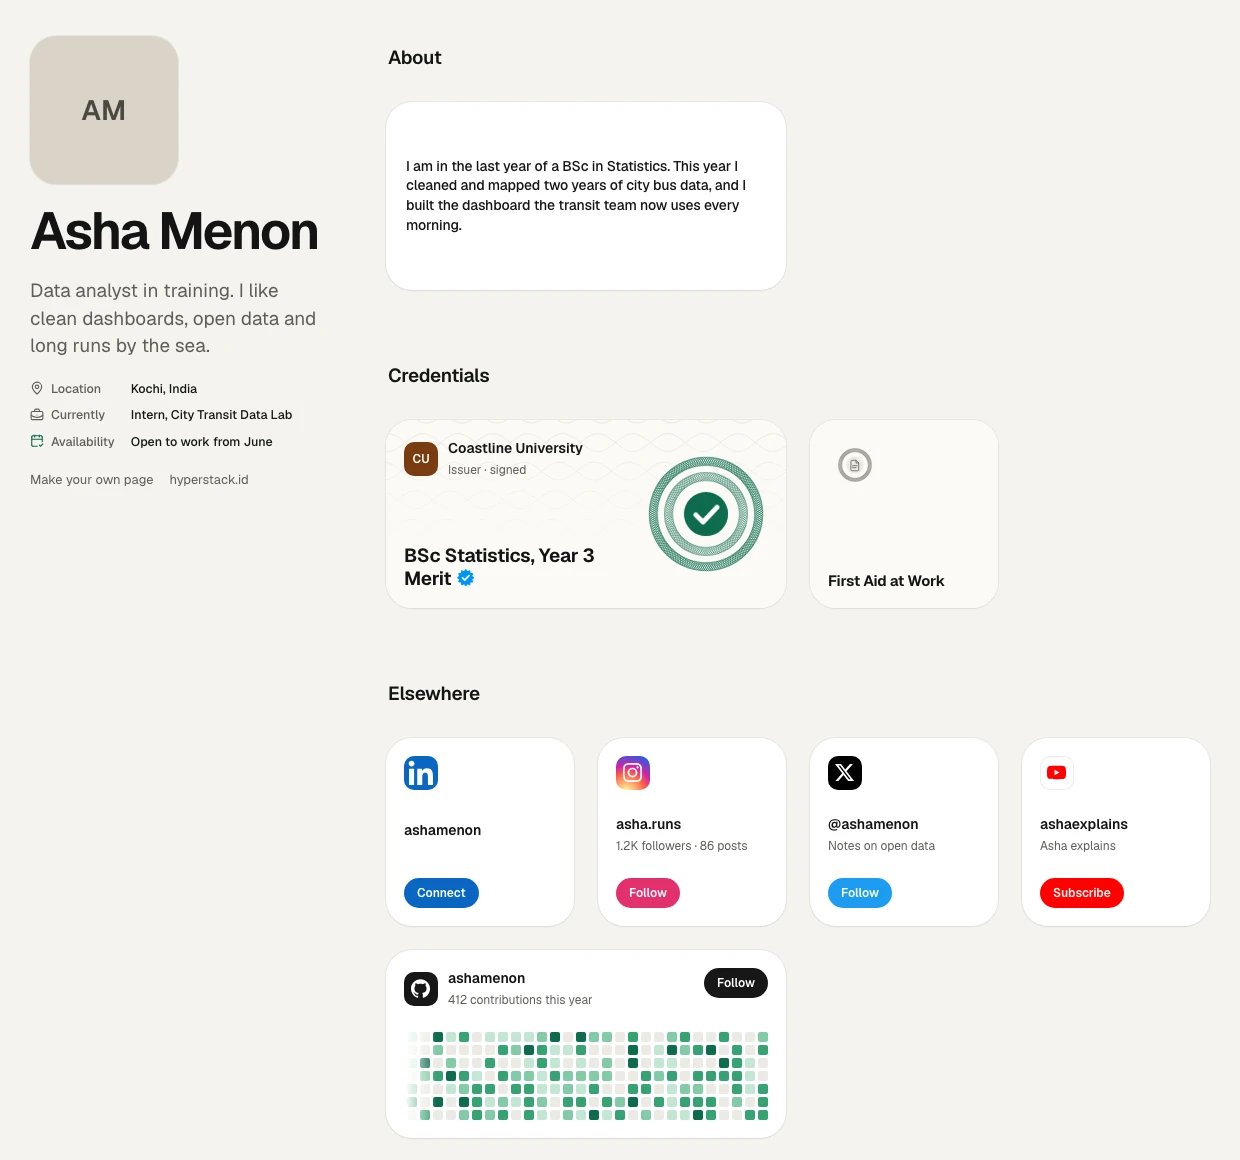
Bento
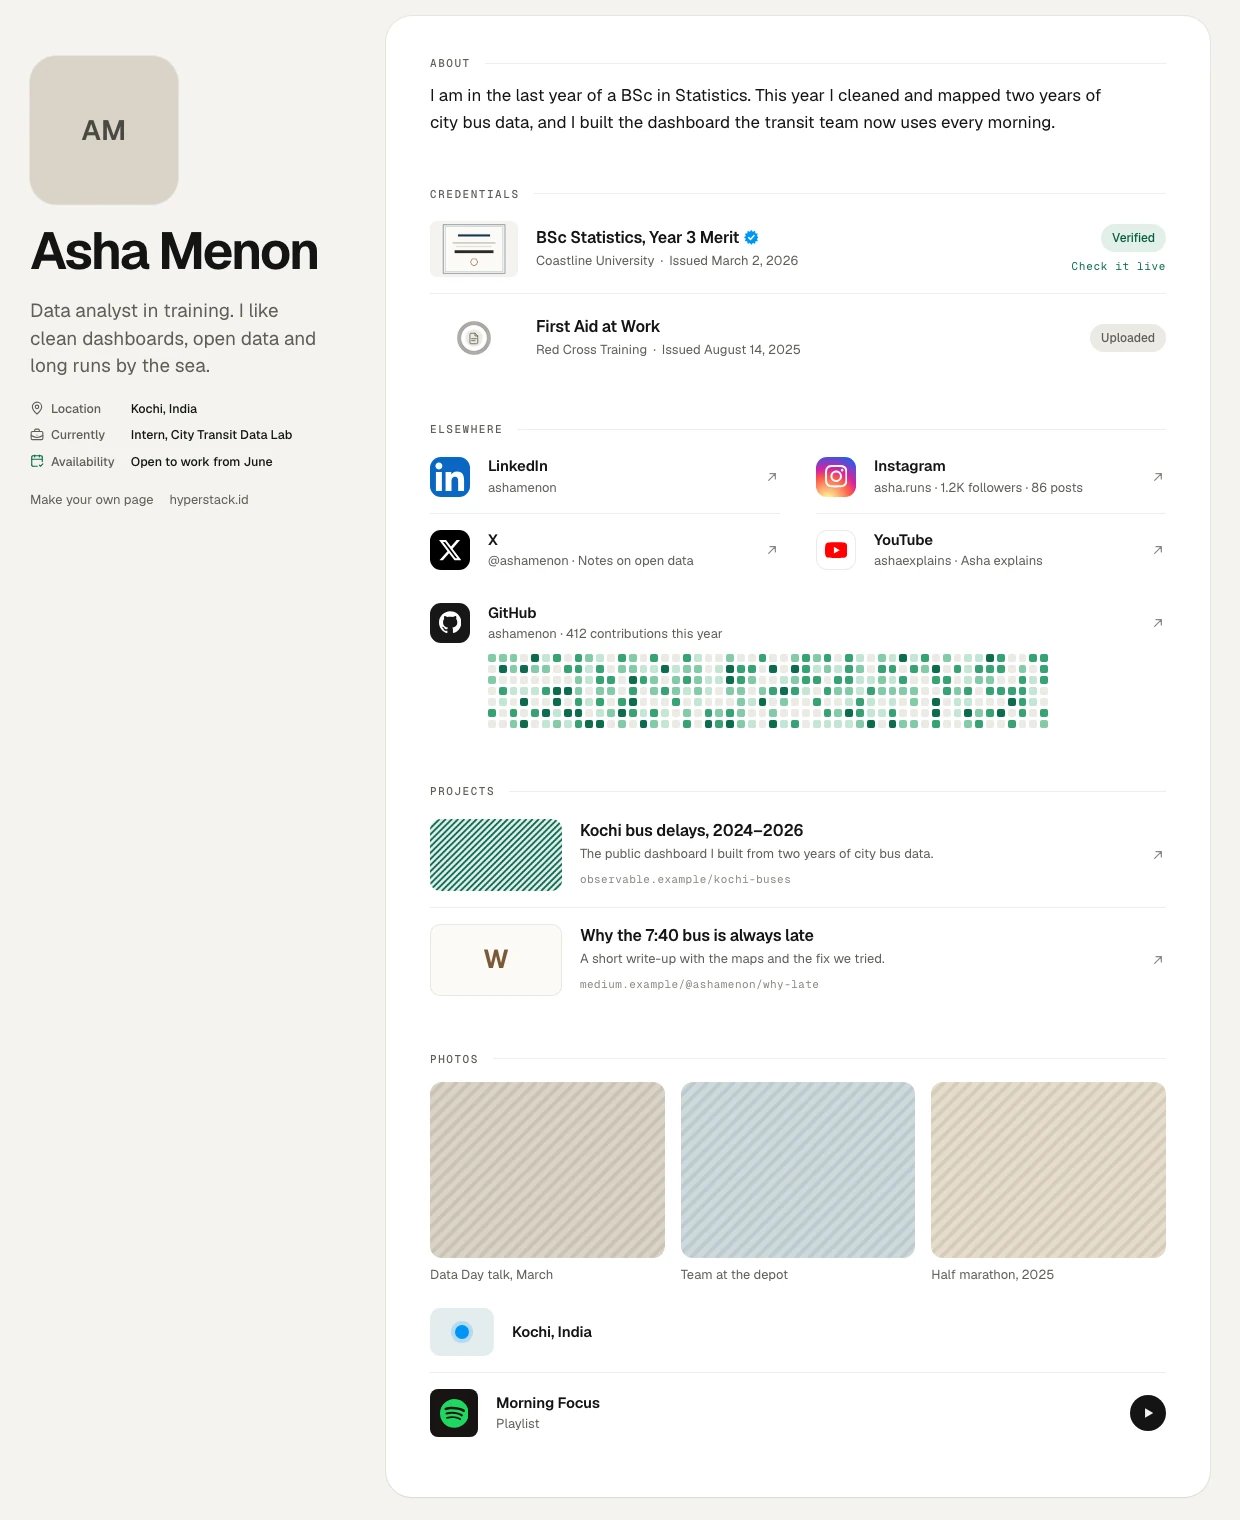
Classic
Switch your page to Classic
1
In your wallet, open the Page tab
2
In the bar at the bottom, click Classic
The Bento | Classic switch is next to the computer and phone buttons. Click Bento to go back.
Move rows in Classic
In Classic, point to a row and click the up or down arrow, or drag the grip on its left. Click a row to edit it.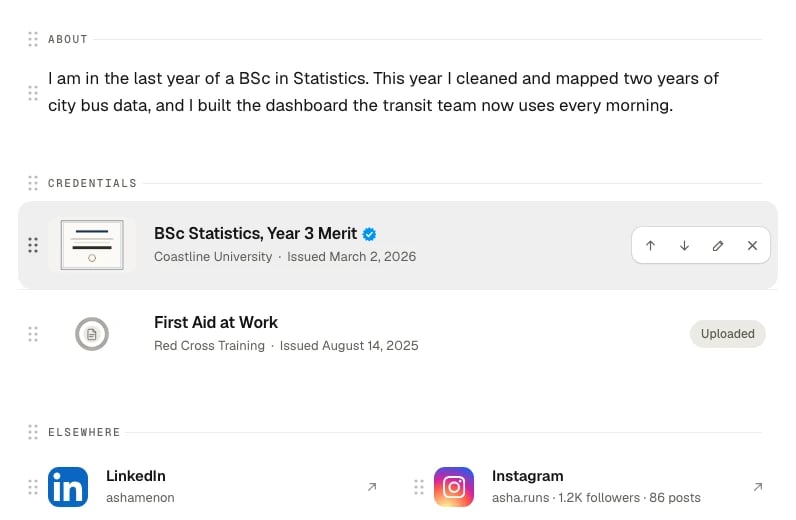
Add your experience
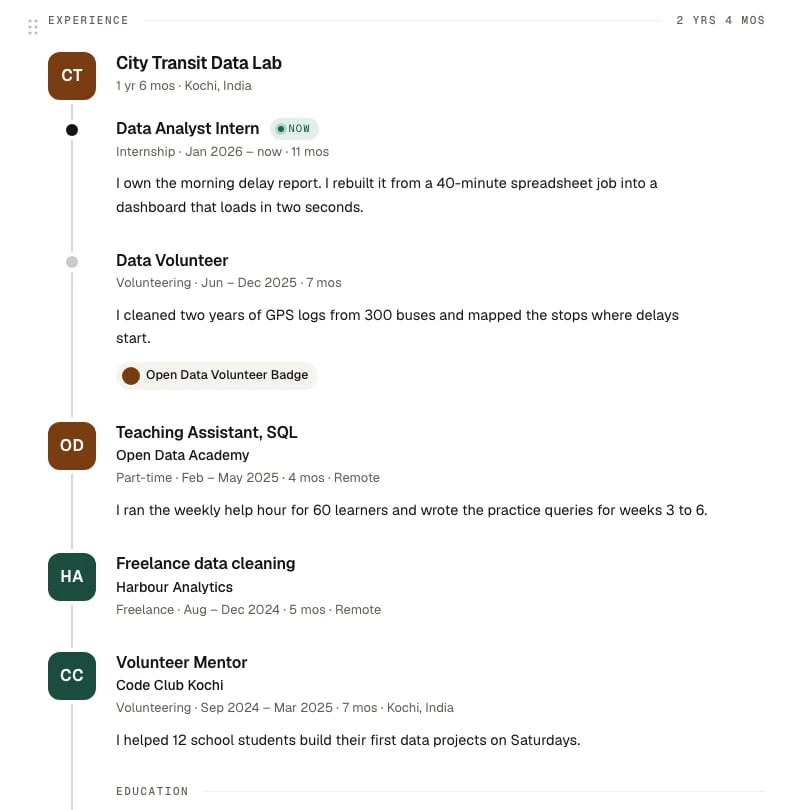
The Experience tile shows your work, studies and volunteering as a timeline, like a CV. You can pin your wallet credentials to each role, so visitors see the proof.Add the Experience tile
1
In the Page tab, click + in the bar at the bottom
2
Click Experience
If you have no roles yet, Your timeline opens. Add your first role there, see Add a role.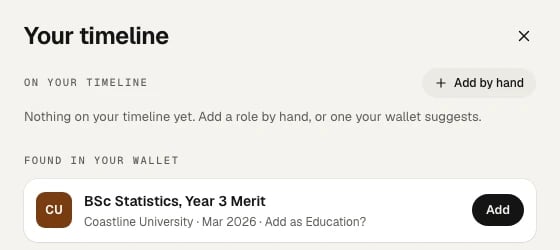
How it looks
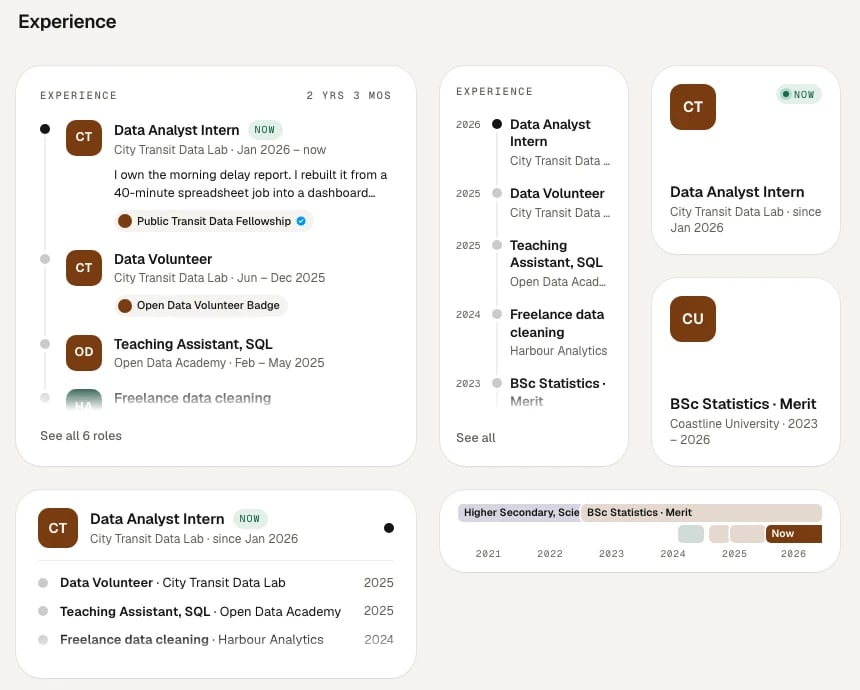
In Bento, the Experience tile has five sizes:- Small: your current role.
- Wide: your current role and the ones before it.
- Tall: your years down the side.
- Large: the full timeline.
- Bar: a ruler of your years.
- Show: pick All, Work or Education.
- Edit timeline: opens Your timeline, where you add and change your roles.
Add a role
1
Click the Experience tile, then Edit timeline
2
Click Add by hand
3
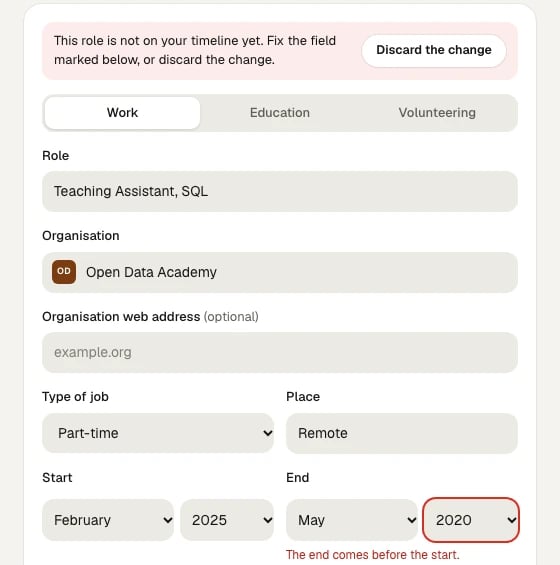
Fill in the role
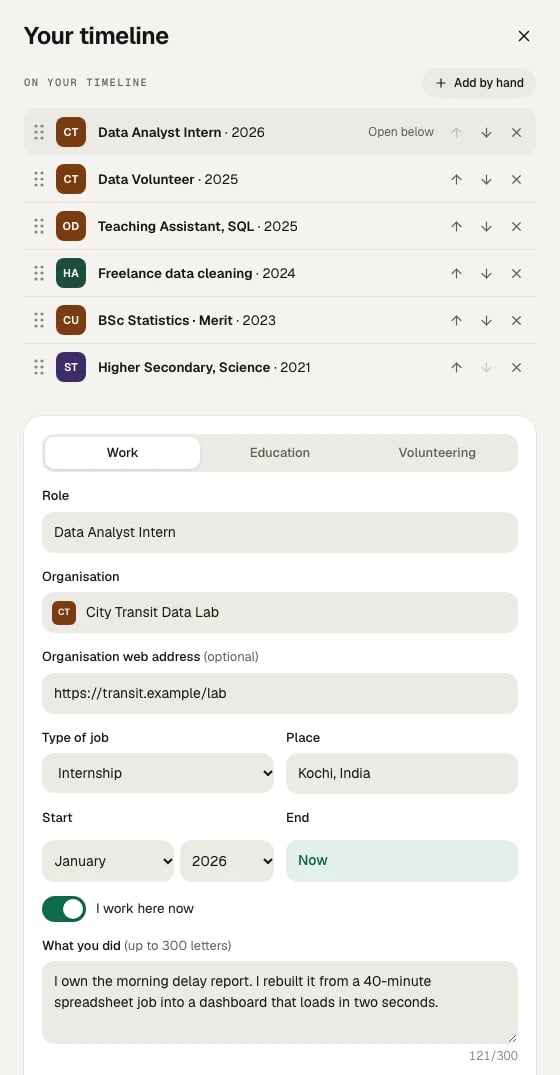
- Pick Work, Education or Volunteering.
- Role, or Course or degree for Education.
- Organisation, or School or university for Education.
- Organisation web address (optional).
- Type of job, for example Full-time, Part-time or Internship.
- Place, for example a city and country.
- Start, and End. If you are still there, turn on I work here now.
- What you did, up to 300 letters.
4
Close Your timeline
Your page saves on its own.
Order and remove roles
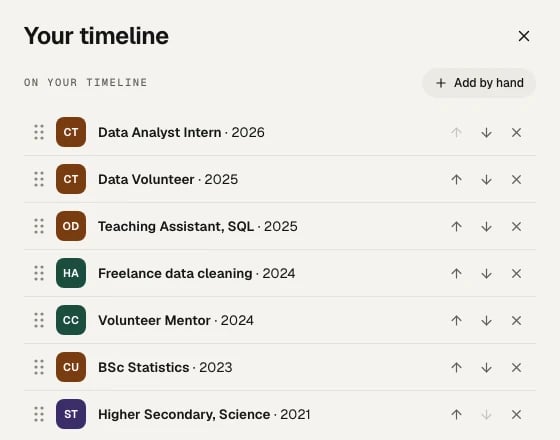
On your timeline lists your roles. Drag a role by its grip, or click the up and down arrows, to put them in your order. Click a role to edit it. To remove a role, click × on its row. Click Undo in the message that shows if you change your mind.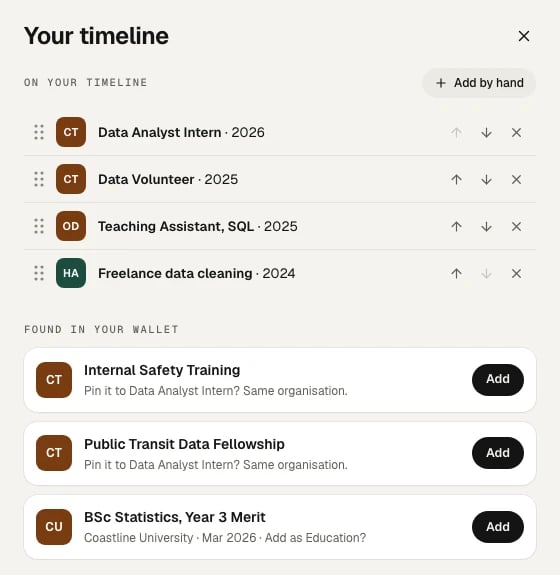
Pin credentials to a role
Show the proof for a role. Under Credentials for this role, click Pin a credential and pick one from your wallet. You can pin up to 5 credentials to each role. Pinned credentials show on the role as small labels. Verified credentials have the verified tick. Click × on a label to unpin it.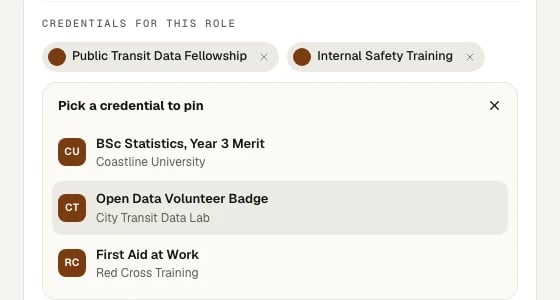
Private credentials don’t show to visitors, even when they are pinned to a role. See Choose what others can see.
Use what is in your wallet
Found in your wallet suggests roles and credentials from your wallet:- A credential from the same organization as a role: click Add to pin it to that role.
- A degree: click Add to add it to your timeline as Education.
Import from LinkedIn
Already have your experience on LinkedIn? Import it, so you don’t have to type every role.1
Save your LinkedIn profile as a PDF
- Sign in to LinkedIn and open your profile.
- Click the More button on your profile.
- Click Save to PDF. LinkedIn downloads the PDF.
2
Open Your timeline
Click the Experience tile, then Edit timeline. Import from LinkedIn is at the bottom.
3
Drop the PDF there, or click Choose PDF
AI reads the file to find your roles. We don’t keep the file.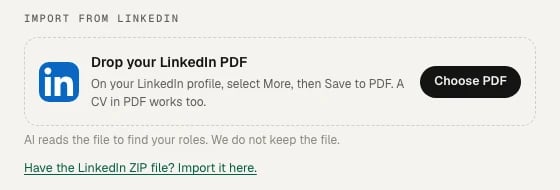
4
Check the roles, then add them
The list shows the roles found in your file. Roles already on your timeline are greyed out and skipped. Clear the box of any role you don’t want. Then click Add, for example Add 3 roles.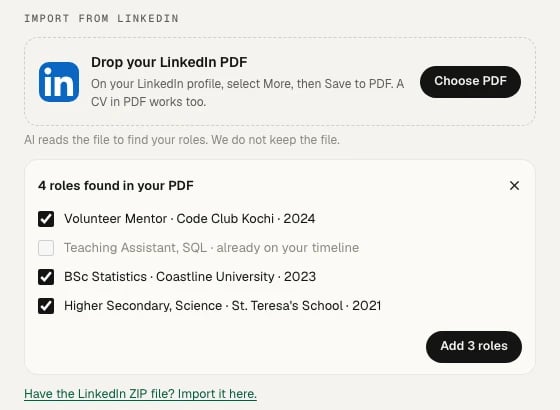
- LinkedIn ZIP file: if you downloaded your LinkedIn data as a ZIP file, click Have the LinkedIn ZIP file? Import it here. under the drop area. Its roles go to the same list to check.
- If your page has no Experience tile, adding imported roles puts one at the top of your page.
- You can import 5 times a day. After that, the sheet says You have used today’s imports. Try again tomorrow.
- Your timeline doesn’t stay in sync with LinkedIn, because LinkedIn doesn’t allow it. When you have a new role, import again: roles already on your timeline are skipped.