

Single sign-on is on the Enterprise plan. Read the overview first to see who can sign in.
SAML or OIDC?
We recommend SAML. With SAML, the Okta tile opens Hyperstack, and a new Okta certificate reaches us by itself from the metadata URL. Use OIDC if your company’s rules ask for it.Start in Hyperstack
Go to Settings → Single sign-on and click Okta. Then choose SAML (recommended) or OIDC.SAML set-up
1
Create the app in Okta
In the Okta Admin Console, open Applications → Create App Integration, pick SAML 2.0 and click Next. Name the app Hyperstack and click Next.
2
Copy our values into Okta
Step 2 of the Hyperstack page, Add Hyperstack to Okta, shows each value with a copy button. Paste them in Okta under Configure SAML: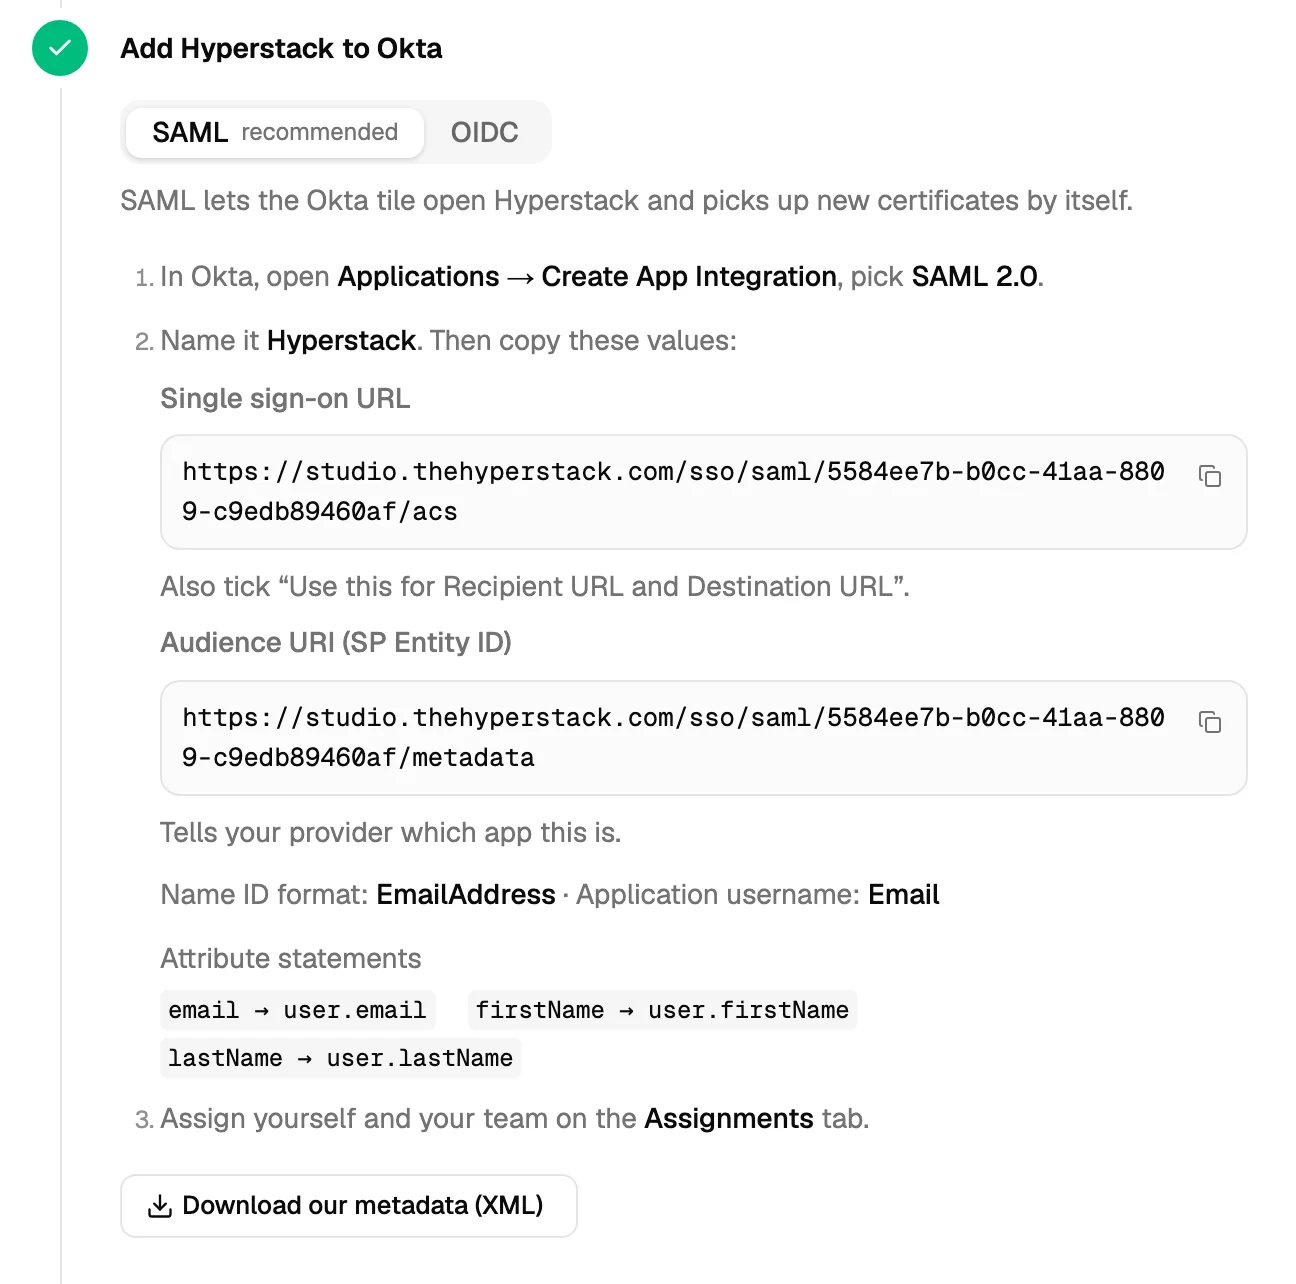
3
Add the attribute statements
Under Attribute Statements, add these three:
Click Next, then Finish.
4
Assign people to the app
Open the app’s Assignments tab. Assign yourself and your team, or a group of them.Assigned people still need to be on your Hyperstack team, or have an invitation. See Who can sign in with SSO.
5
Copy the Metadata URL into Hyperstack
In Okta, open the app’s Sign On tab and copy the Metadata URL.In Hyperstack, step 3 Connect Okta, paste it in Metadata URL and click Save connection. You see Connected to Okta with the issuer and the date the certificate ends.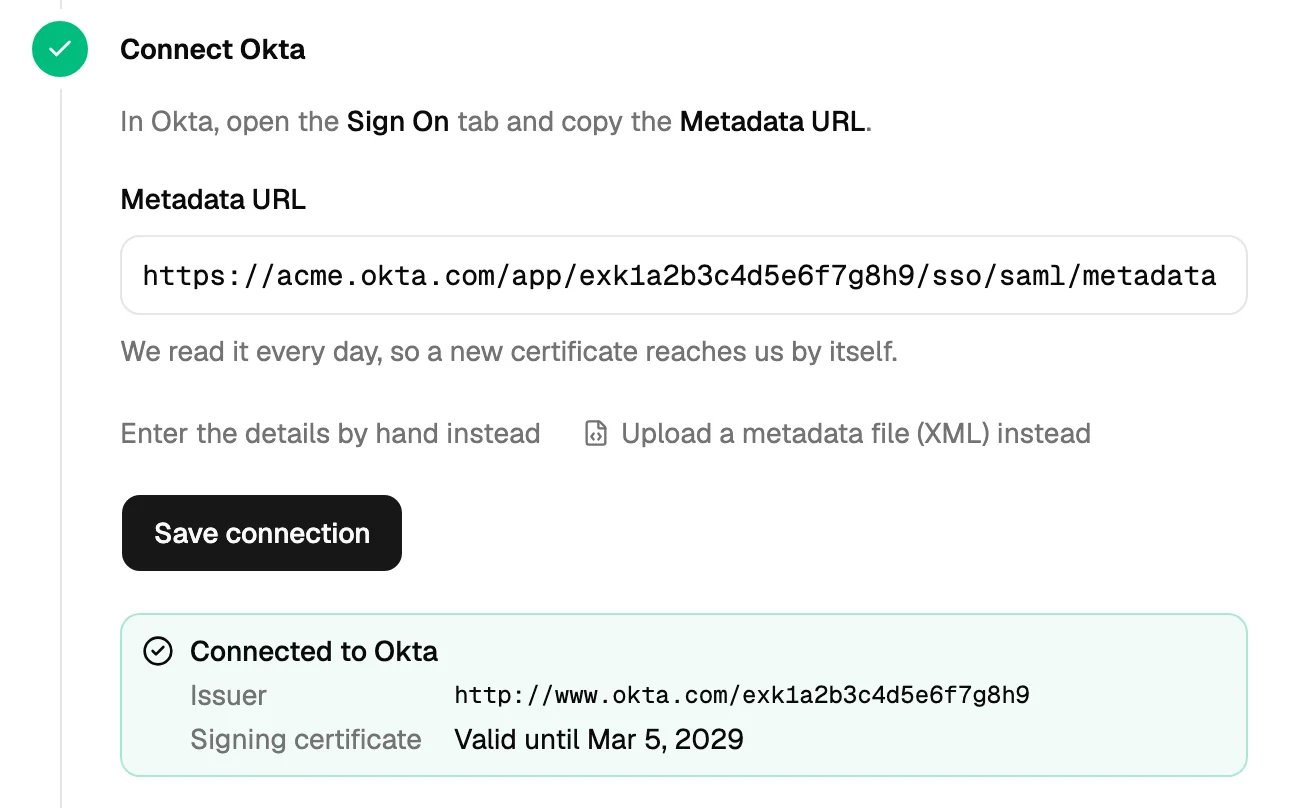
OIDC set-up
1
Create the app in Okta
In the Okta Admin Console, open Applications → Create App Integration. Pick OIDC - OpenID Connect and Web Application, then click Next. Name the app Hyperstack.
2
Copy our values into Okta
Step 2 of the Hyperstack page shows the values for OIDC: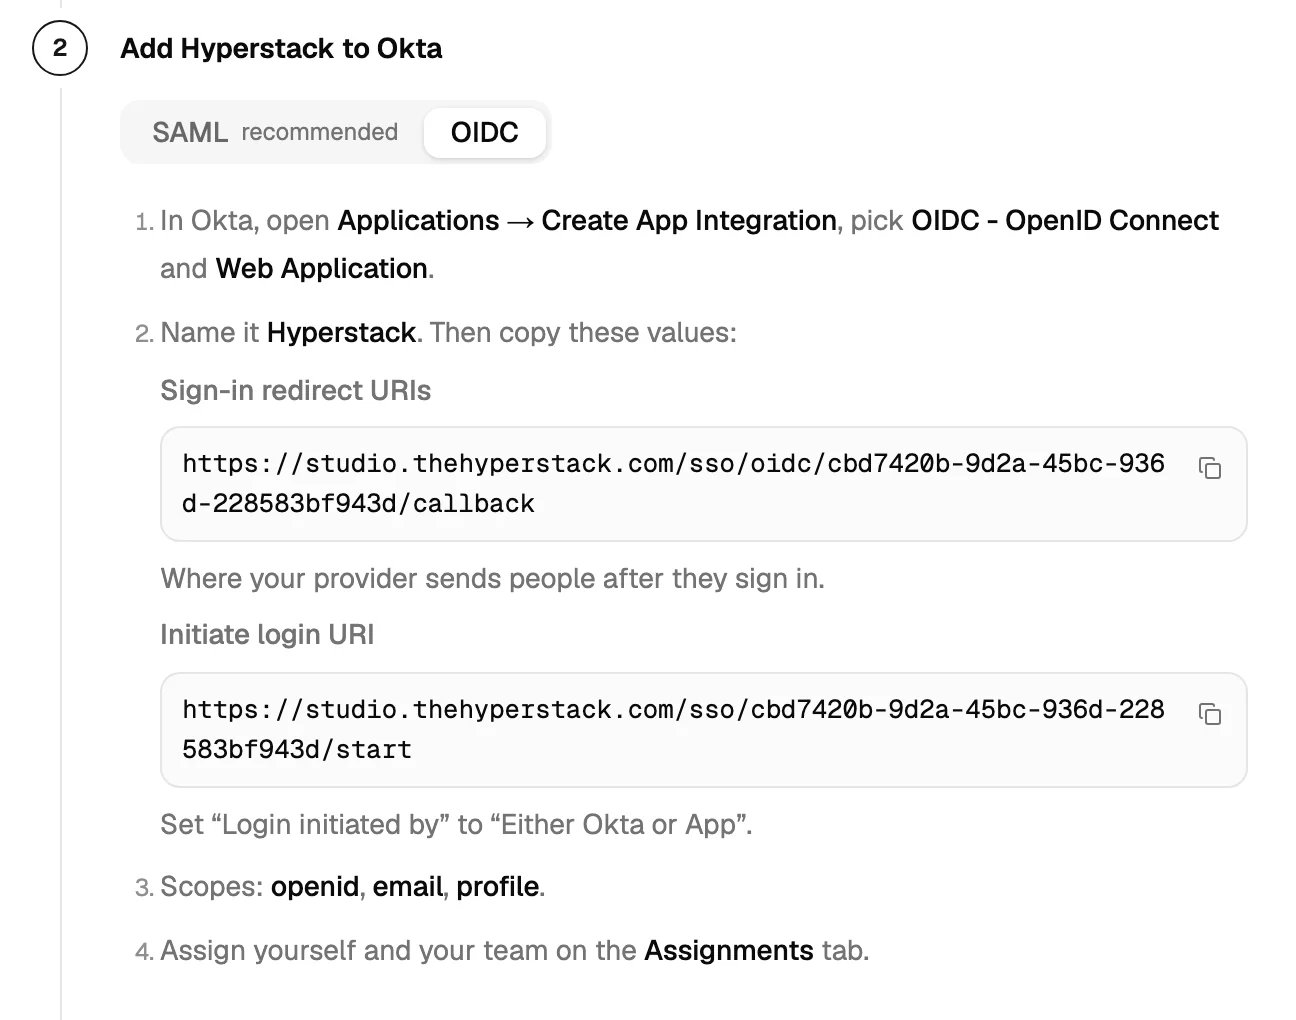
Hyperstack asks for the scopes openid, email and profile. Okta allows them for a new app.
3
Assign people to the app
Under Assignments, assign yourself and your team, then click Save. You can change this later on the app’s Assignments tab.
4
Copy the client values into Hyperstack
In Okta, the app’s General tab shows the Client ID and the Client secret.In Hyperstack, step 3 Connect Okta, fill in:
- Issuer URL: your Okta address, such as
https://acme.okta.com. - Client ID
- Client secret
Finish in Hyperstack
1
Verify your email domain
Add your domain, such as
acme.com, and add the TXT record that Hyperstack shows to your DNS. See Verify a domain.2
Click Test sign-in
A new tab opens Okta. Sign in there. The test doesn’t change your account or sign you in.When the test passes, you see Test passed with the email, the name and the Okta ID that Okta sent. If the email is yours, you also see Your account is now linked to Okta.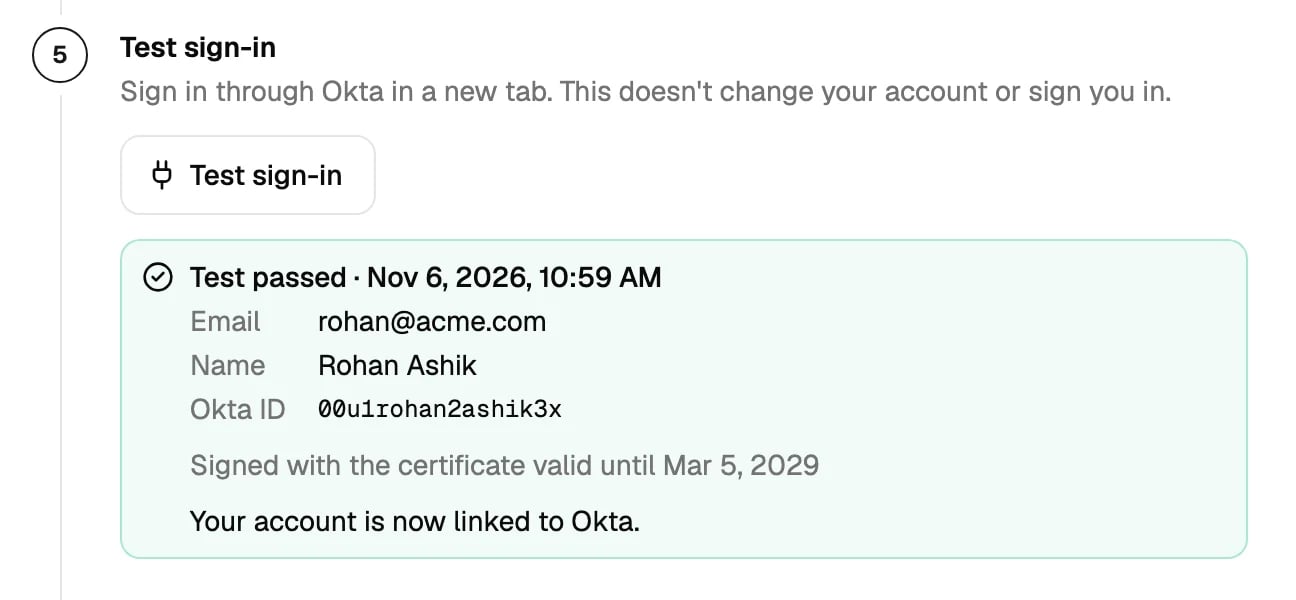
3
Click Turn on SSO
You see SSO is on. Your team can sign in with Okta. Passwords keep working until you enforce SSO.
Questions
The test says I'm not assigned to the app in Okta
The test says I'm not assigned to the app in Okta
Open the app’s Assignments tab in Okta and assign yourself. Then click Test again.
The test says no email came back
The test says no email came back
For SAML, add the attribute statement
email with the value user.email. For OIDC, check that the app allows the email scope.Does the Okta tile work?
Does the Okta tile work?
Yes, with SAML. With OIDC, set Login initiated by to Either Okta or App and fill in Initiate login URI.
Can I change the connection after SSO is on?
Can I change the connection after SSO is on?
Yes. On Settings → Single sign-on, click Edit connection. A change applies at once and asks for a new test sign-in. A change to the metadata URL, the sign-in URL, the issuer, the certificate, the client ID or the secret also turns SSO off until a new test passes. See Change the connection. To see our values again, click Show the values for Okta.