

Single sign-on is on the Enterprise plan. Read the overview first to see who can sign in.
Our values
Each organization has its own values. Copy them from step 2 of the Hyperstack page, not from this guide. They look like this:SAML
What to set in your provider
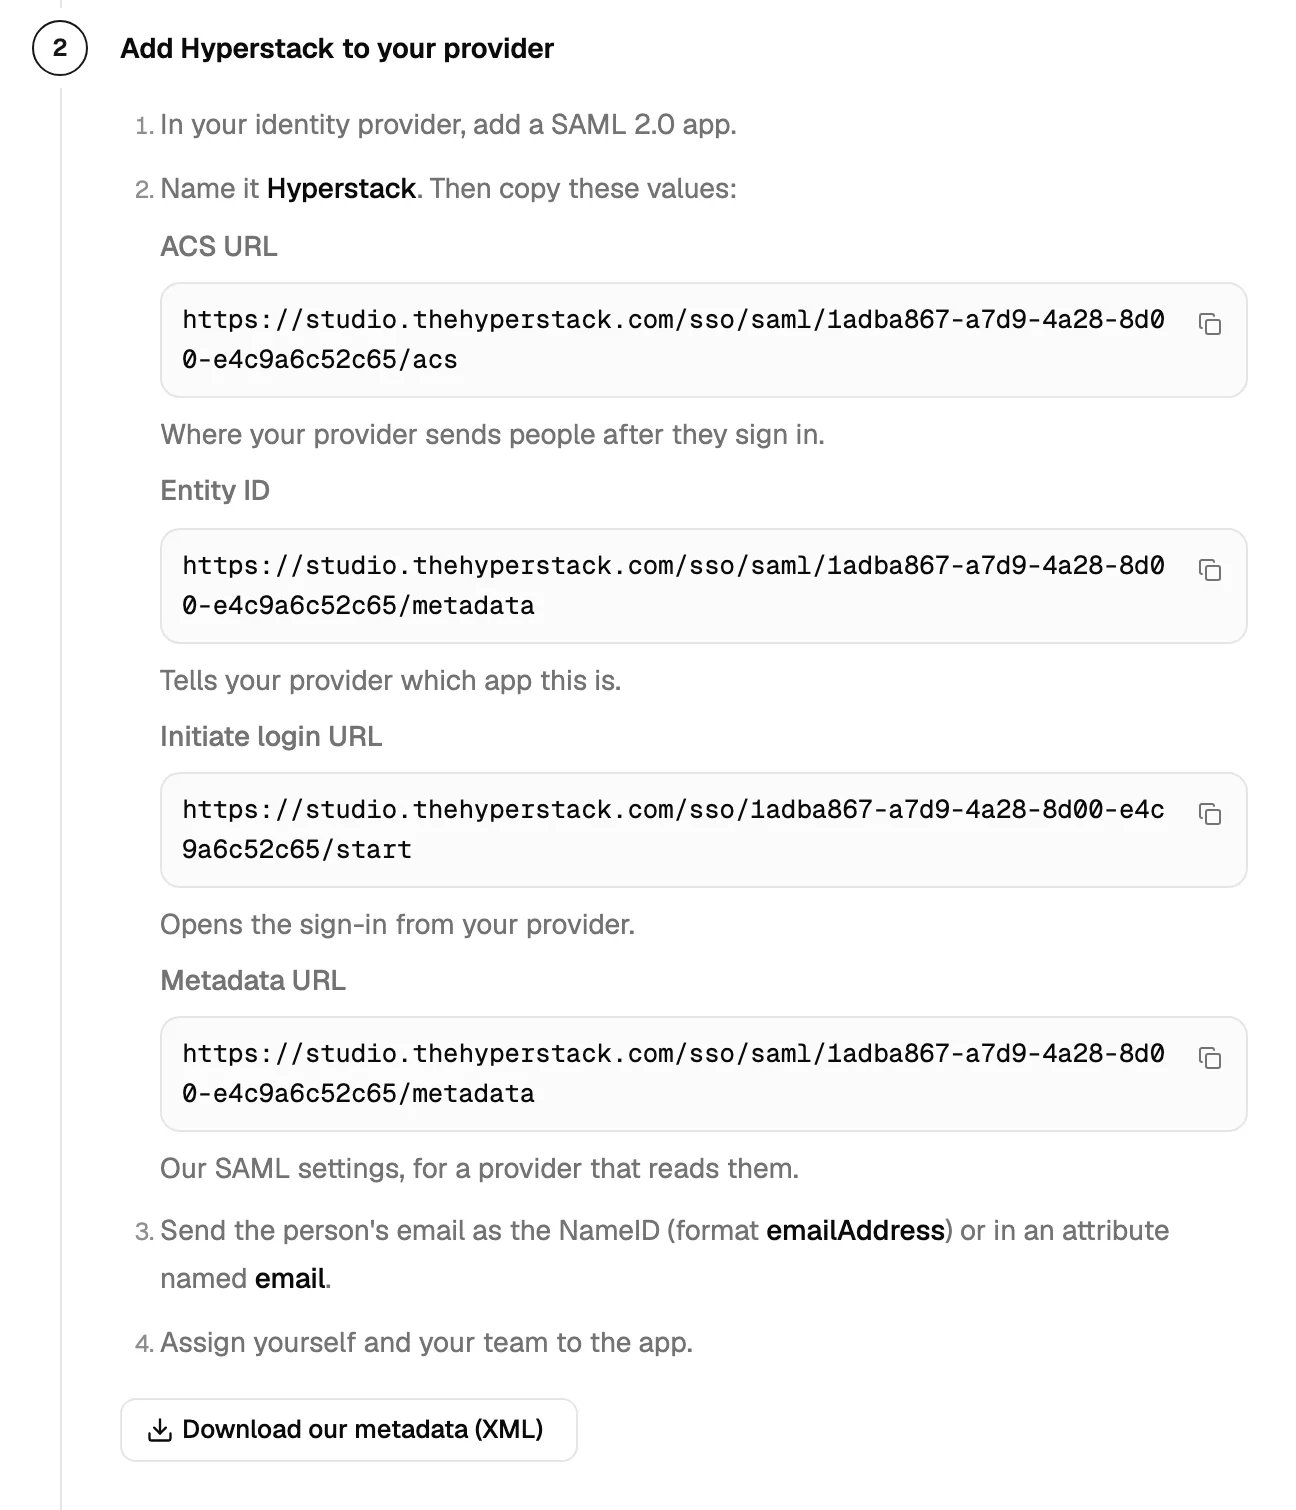
- ACS URL (also called Reply URL, Single sign-on URL or Recipient): our ACS URL. Hyperstack takes the answer by HTTP POST.
- Entity ID (also called Audience or SP entity ID): our Entity ID.
- Start URL or Login URL, if your provider asks: our Initiate login URL.
- The email: send it as the NameID with the format emailAddress, or in an attribute named email.
- The name (optional): attributes such as
firstNameandlastName, orgivenNameandsurname, ordisplayName. - Signing: sign the assertion, the response or both, with SHA-256 or stronger. Hyperstack refuses SHA-1 signatures.
- Encryption: turn off assertion encryption. Hyperstack doesn’t read encrypted assertions yet.
mail, emailAddress, http://schemas.xmlsoap.org/ws/2005/05/identity/claims/emailaddress and urn:oid:0.9.2342.19200300.100.1.3.
What to bring back
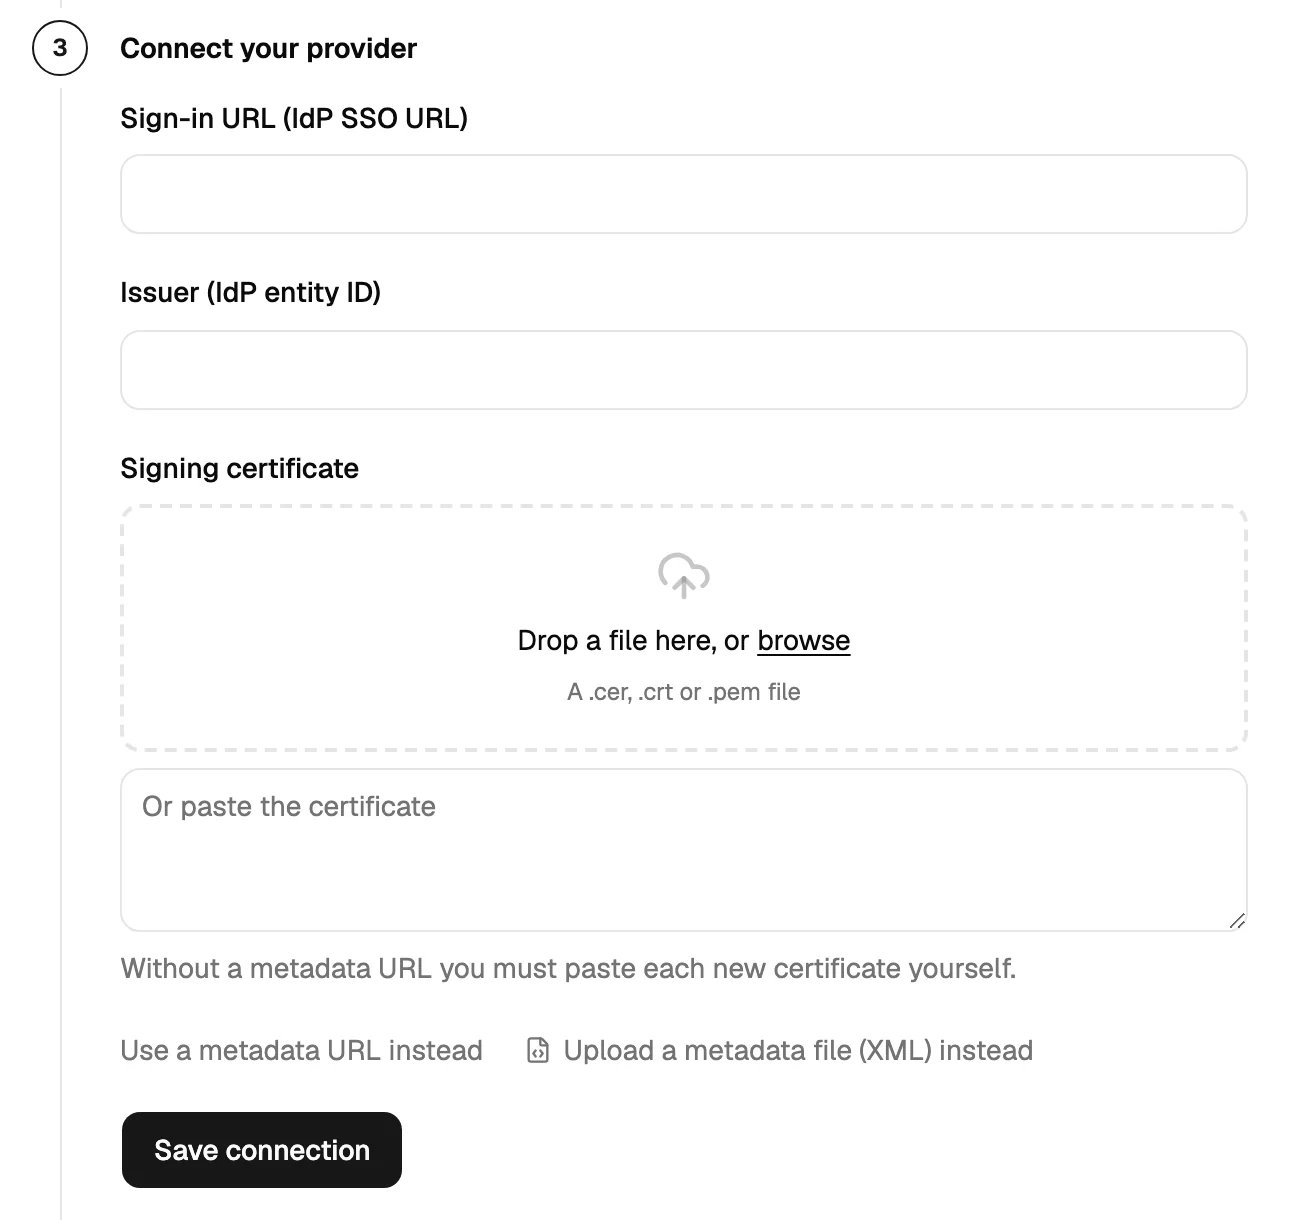
In step 3 of the Hyperstack page, use one of these three ways:- Metadata URL: the best way. We read it once a day, so a new certificate reaches us by itself within 24 hours. After your provider makes a new certificate active, click Refresh certificates on Settings → Single sign-on to add it at once.
- Upload a metadata file (XML) instead: Hyperstack reads the fields from your provider’s metadata file.
- Enter the details by hand instead: fill in Sign-in URL (IdP SSO URL), Issuer (IdP entity ID) and Signing certificate (a .cer, .crt or .pem file, or paste it).
Google Workspace
1
Add a custom SAML app
In the Google Admin console, open Apps → Web and mobile apps → Add app → Add custom SAML app. Name it Hyperstack and click Continue.
2
Download the metadata
On Google Identity Provider details, click Download Metadata and click Continue.
3
Fill in the service provider details
Paste our ACS URL in ACS URL and our Entity ID in Entity ID. Set Name ID format to EMAIL and Name ID to Basic Information → Primary email. Click Continue, then Finish.
4
Turn on the app for your people
Open the app, then User access. Set it to ON for everyone, or for the groups or organizational units that use Hyperstack.
5
Upload the metadata in Hyperstack
In step 3, click Upload a metadata file (XML) instead and choose the file you downloaded. Then click Save connection.
OIDC
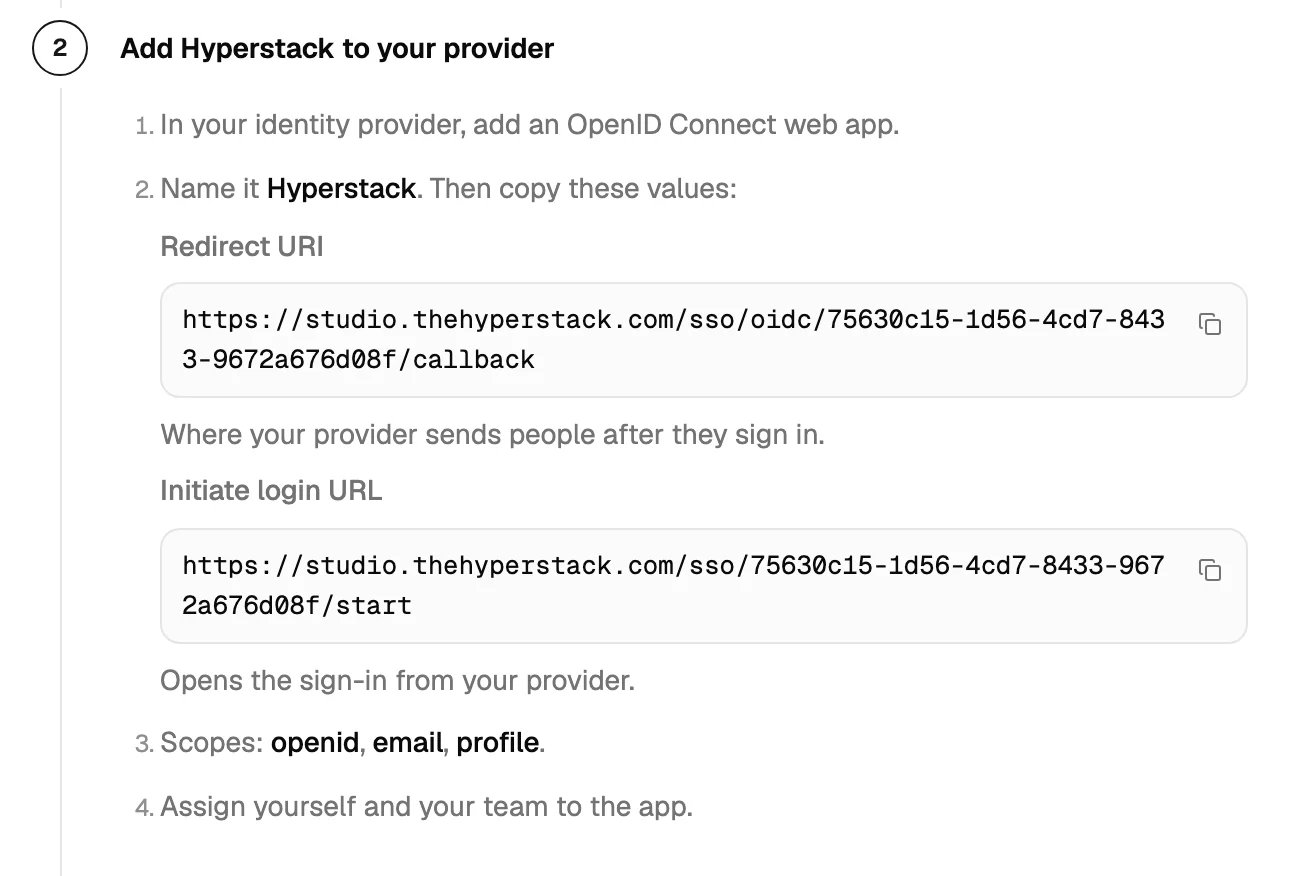
What to set in your provider
- Add a web app (a confidential client with a client secret).
- Redirect URI: our Redirect URI.
- Initiate login URL, if your provider has an app tile: our Initiate login URL.
- Grant type: authorization code. Hyperstack uses PKCE (S256).
- Scopes: openid, email and profile.
- Client authentication:
client_secret_basicorclient_secret_post. - ID token signing: RS256 or ES256.
- Email: send
emailwithemail_verifiedset to true.
What to bring back
In step 3, fill in:- Issuer URL: the issuer of your provider. It ends before
/.well-known. Hyperstack reads<Issuer URL>/.well-known/openid-configuration, and the issuer in it must be exactly the same. - Client ID
- Client secret
Finish in Hyperstack
1
Verify your email domain
Add your domain, such as
acme.com, and add the TXT record that Hyperstack shows to your DNS. See Verify a domain.2
Click Test sign-in
A new tab opens your provider. Sign in there. When the test passes, you see Test passed with the email, the name and the Provider ID that came back. If it fails, see Test sign-in results.
3
Click Turn on SSO
Your team can now sign in with SSO. Passwords keep working until you enforce SSO.
Questions
Does Hyperstack sign its requests?
Does Hyperstack sign its requests?
No. Hyperstack’s SAML requests are not signed. Okta, Entra and most providers don’t ask for this.
Does single logout (SLO) work?
Does single logout (SLO) work?
No. Signing out of Hyperstack signs you out of Hyperstack only.
We use Shibboleth with more than one identity provider
We use Shibboleth with more than one identity provider
Hyperstack connects to one identity provider per organization. Use the one that holds your staff accounts.
Can I paste a certificate instead of a file?
Can I paste a certificate instead of a file?
Yes. In Enter the details by hand instead, use Or paste the certificate.